Picture this: you pull out your old cast iron pan and—yikes—there’s a layer of stubborn red rust glaring back at you. It feels like culinary defeat, right on your countertop. But don’t toss it just yet.
Allowing cast iron to rust isn’t just annoying; it can cost you both money and memories. That heirloom skillet or thrift store gem suddenly feels like a lost cause, and every meal cooked on a cracked or flaky surface just doesn’t taste the same. Let’s be honest, nobody wants to scrub for hours only to end up with dull, patchy iron—especially when the solution is within reach.
Stick with me, because by the end of this guide you’ll know exactly how to restore rusty cast iron to its smooth, glossy glory—and unlock a pan that genuinely cooks better than new. Ready to get your hands a little dirty? Let’s start the rescue.
Understanding Why Cast Iron Rusts (And How Bad Is Too Bad?)
Ever stared at those orange-brown patches crawling across a cast iron pan and wondered—does this mean it’s done for? You’re definitely not alone. The truth is, rusted cast iron often sparks panic, but the science behind it is actually simple—and surprisingly hopeful.
Rust is just iron oxide, which forms when iron reacts with water and oxygen. It doesn’t mean your pan is ruined, just that it’s lost part of its protective layer. Why does it happen? Moisture left after washing, storing a pan before it’s fully dry, or even a humid kitchen can all trigger it. The real enemy: letting it sit for weeks or months without attention.
But how bad is too bad? Here’s where understanding the stages matters. Light surface rust is just a cosmetic issue—a bit rough, looks ugly, but comes off easily. Moderate rust feels gritty, and may cover large patches but still doesn’t compromise the pan’s structure. Severe rust, though, means deep pitting or flaking, where the iron itself has started breaking down. At that point, restoration may not fully bring it back.
💡 Pro Tip: According to guidance from The Lodge Cast Iron Company, pans with only surface or moderate rust can almost always be saved at home, while those with deep pitting sometimes require professional assessment if you want absolute safety for food use.
In practice: imagine you find your grandma’s old skillet in the garage and the entire bottom is rust-colored, but the rim feels solid, with no holes. That’s a win—the pan can likely be restored. But if you poke it and fine powder or chunks come off, professional help or even replacement might be safest.
| Rust Level | What It Looks Like | Can It Be Saved? |
|---|---|---|
| Light | Splotchy orange, rough texture | Yes, easy home fix |
| Moderate | All-over red, gritty, no holes | Yes, more elbow grease needed |
| Severe | Deep pitting, layers flake off | Maybe, often needs pro assessment |
But there’s one detail most owners completely overlook until it’s too late…
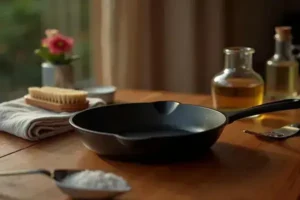
Essential Tools And Ingredients For Cast Iron Restoration
Ever tried scrubbing your cast iron pan with just a sponge and felt like you were fighting a losing battle? The right tools don’t just make cleaning easier—they literally decide whether your pan gets fully restored or stays patchy and rough. Gather the right supplies before you start, and you’ll save yourself a world of frustration.
- Stiff bristle brush: Removes loose rust and debris without harming the iron.
- Steel wool (grade #0 or #1): Ideal for tackling stubborn rust patches and smoothing rough spots.
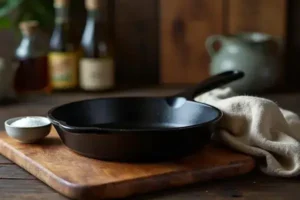
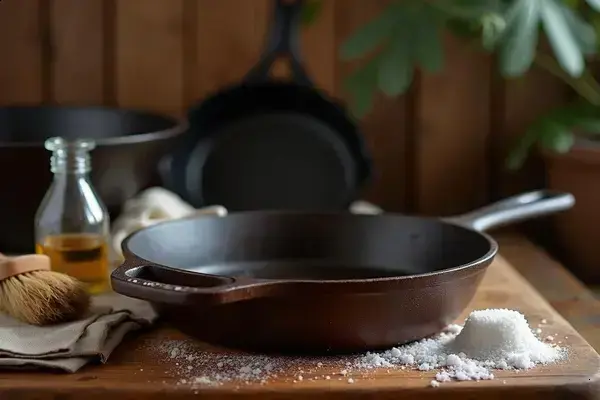
- Coarse kosher salt: Acts as a gentle abrasive for a quick surface clean, especially when you want to avoid steel wool on lighter cases.
- Baking soda: Helps neutralize acidic residues and can boost your cleaning power without scratching.
- White vinegar: Mix it with water for a short soak—essential when surface rust really won’t budge (but don’t overdo it).
- Dish soap (mild, fragrance-free): Just for the initial deep clean, not for everyday use. The USDA Food Safety and Inspection Service confirms soap is perfectly safe for this stage.
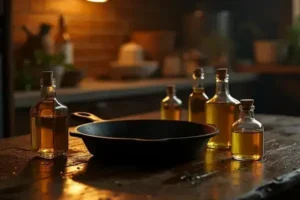
- Flaxseed or canola oil: The industry favorites for re-seasoning since they polymerize at high heat, forming a robust nonstick layer.
- Heavy-duty gloves: Protect your hands from cleaning agents and hot surfaces.
- Clean lint-free cloths: For wiping, drying, and oil application.
- Aluminum foil: Useful for a gentle scrub if the brush isn’t enough and for lining oven racks during re-seasoning.
💡 Pro Tip: Don’t use any cleaner with bleach or citrus—both can strip away the iron’s natural oils or pit the surface, leading to future rust.
Picture this scenario: you’re standing in your kitchen with a pan so rusted it looks like it belonged to a pirate. Instead of attacking it with your usual kitchen sponge—or worse, a random harsh cleaner—you’ve stocked up with a sturdy brush, a new pack of kosher salt, and a bottle of flaxseed oil you picked up just for the occasion. The process turns from a scavenger hunt into a simple, practical routine.
| Tool/Ingredient | Purpose | Avoid Using |
|---|---|---|
| Stiff Bristle Brush | Initial rust/debris removal | Metal scouring pads |
| Steel Wool | Smooth rusted areas | Sandpaper (too abrasive) |
| Baking Soda | Neutralize acids & gentle scrub | Lemon juice |
| Flaxseed Oil | Builds durable seasoning | Butter or olive oil |
What actually works might surprise you…
Step-By-Step: Removing Rust And Getting Back To Bare Metal
Ready to bring that rusty skillet back from the edge? Here’s the reality—most people either panic and over-scrub, or they under-clean and leave rust hiding in crevices. With the right strategy, you’ll rescue that pan and see bare, beautiful iron in no time.
- Items you’ll need:
- Stiff bristle brush
- Steel wool (#0/#1)
- Coarse kosher salt
- White vinegar
- Mild dish soap
- Heavy-duty gloves
- Clean, lint-free cloths
- Initial Wash: Rinse the pan under hot water. Scrub with the brush and a drop of mild dish soap to dislodge oils, food and loose rust. Dry it thoroughly.
- Surface Rust Removal: Sprinkle coarse kosher salt over the rusty areas. Scrub robustly with steel wool or a brush, keeping circular motions on trouble spots. If rust is minimal, salt may do the job solo.
- Vinegar Soak (if needed): For stubborn patches, mix equal parts white vinegar and water. Submerge only the rusted section for 20–30 minutes—any longer risks pitting the metal.
- Final Scrub: After soaking, repeat scrubbing with fresh steel wool. Rinse under warm water until all gritty or rough spots are gone. The iron should now look matte silver and uniform.
- Neutralize & Dry: Dust baking soda over the surface and briefly scrub to halt vinegar’s effect. Rinse and dry the pan immediately—use a towel and a low oven heat for complete dryness.
💡 Pro Tip: According to research at Cook’s Illustrated, never leave vinegar on cast iron unattended—the acid can quickly cause pitting that’s nearly impossible to reverse.
In practice: imagine it’s Sunday afternoon, your kitchen’s full of sunlight, and you’re working through one stubborn skillet. After 25 minutes of focused effort, the rusty hue gives way to honest, silvery iron. It’s not magic—it’s patience and good technique, not brute force or random household cleaners.
And this is exactly where most people make the most common mistake…
How To Re-Season For Long-Lasting Nonstick Performance
Ever finished scrubbing a rusty pan, only for it to stick and spot after a single use? That’s where re-seasoning comes in—think of it like giving your cast iron a suit of armor and the slick surface you love. Done right, you’ll get decades of naturally nonstick performance.
- Start With Bare, Dry Iron: After you’ve removed all rust, make sure your pan is bone-dry. Warm it briefly in the oven at 200°F to evaporate hidden moisture.
- Apply a Thin Oil Layer: Pour a teaspoon of flaxseed or canola oil into the pan. Use a lint-free cloth to rub it all over—inside, outside, even the handle. Remove every excess glimmer until the pan’s just lustrous, not wet.
- Bake Upside Down: Preheat your oven to 450–500°F. Place the pan upside down on the middle rack; line the rack below with foil to catch drips. Bake for 1 hour, then let it cool in the oven (door closed) for another hour. This process polymerizes the oil, bonding it into a protective, glassy layer.
- Repeat If Needed: For a tougher nonstick surface, repeat the oil and bake steps up to three times.
- Finish and Test: Once your pan is cool, test it with fried eggs or pancakes—the true benchmark of seasoning in the eyes of Southern Living magazine’s cookware experts.
💡 Pro Tip: Use high-smoke-point oils like flaxseed or grapeseed for longer-lasting results—avoid butter, olive oil, or vegetable shortening, since they can leave a sticky film rather than a durable coating.
Picture this scenario: you spend an hour re-seasoning your just-rescued skillet, letting it cool in the oven, anticipation thick as molasses. Next morning, you fry an egg and it slides right off—proof you did it right and the pan’s ready for action.
| Oil Type | Nonstick Longevity | Best For |
|---|---|---|
| Flaxseed Oil | High | Intense baking, new seasoning |
| Canola Oil | Medium | Maintenance, budget seasoning |
| Grapeseed Oil | High | Fast polymerizing, repeated use |
But there’s a catch—maintaining nonstick perfection isn’t a one-time job…
Ongoing Care: Preventing Rust From Ever Coming Back
How do you keep rust from ruining all your hard work—especially when life gets messy and routines slip? Here’s the thing: daily care isn’t complicated, but it absolutely determines if your pan stays slick or slips back into trouble. If you want nonstick performance and a gorgeous patina, the habits you form now matter most.
- Dry Immediately: Never air-dry cast iron. Wipe thoroughly and then set it over low heat for 2–3 minutes to evaporate every last drop of moisture.
- Oil After Every Use: Once cool but not cold, rub a drop of canola or flaxseed oil into the surface using a lint-free cloth. This micro-layer restores protection and sheen.
- Avoid Soaking: Letting your pan sit in water—even for a short while—can sneak rust into hidden cracks.
- No Acidic Storage: Don’t store tomato sauce or highly acidic foods in your cast iron. They break down seasoning and create sticky spots prone to rust.
- Ventilate Storage: Rest your pan with the lid slightly off or in a dry spot. A closed, humid cabinet can cause moisture buildup and the return of rust.
⚠️ Important Warning: If your pan was ever treated with harsh chemicals or you notice recurring rust that just won’t quit, consult with a professional or reference guidelines from the USDA Food Safety and Inspection Service to ensure safe cooking surfaces. Safety always comes first with vintage or heavily restored cookware.
In practice: after Sunday’s breakfast, you rinse your pan quickly, dry it over the stove, and rub in a hint of oil while it’s still warm. Store it with the lid propped slightly open—nothing fancy, just one conscious step after each use. That’s the difference between dealing with rust once every few years or every single season.
| Essential Habit | Why It Matters | Frequency |
|---|---|---|
| Heat-drying | Removes 100% of moisture | Every use |
| Light Oiling | Keeps seasoning strong | After each wash |
| Ventilated Storage | Stops rust before it starts | Always |
The right habits in place now make everything easier from here.
Your Cast Iron’s New Beginning
If you take just one thing from this guide, let it be: how to restore rusty cast iron isn’t magic — it’s knowing the right care, following easy steps, and building good habits. Clean rust with purpose, re-season for strength, and keep it dry and oiled—those three steps carry your pan for decades.
Before today, a rusty pan felt like trouble or a loss. Now you know it’s completely fixable. You can transform a battered skillet into the heart of your kitchen again. Every meal you cook from here on out will only get better as that seasoning grows. Feels good, right?
What’s the first cast iron rescue you’re planning — a family heirloom, thrift store score, or your everyday skillet? Share your story in the comments. We can’t wait to hear what’s sizzling. 🍳

Blake Aaron Mercer is a cast iron cookware enthusiast and home cook dedicated to helping everyday people get the most out of their skillets, Dutch ovens, and griddles. With years of hands-on experience seasoning, restoring, and cooking with cast iron, Blake built Hnnew to be the honest, practical cast iron resource he always wished existed when he was starting out.