Ever pulled out your favorite skillet, only to find food sticking everywhere—leaving you frustrated at cleanup time? That moment is a clear sign your cast iron needs a little TLC, though most folks only notice when dinner goes sideways.
Letting seasoning slide can turn a good pan into a kitchen headache. Suddenly, you’re scrubbing crusty bits, battling rusty patches, and watching those once-magical sears lose their charm. Nobody signs up for all that extra elbow grease (or the lackluster meals).
By the time you finish reading, you’ll know exactly how often to season cast iron—plus the signs your pan needs attention, and a maintenance plan that actually fits your life. Ready to see what your skillet can really do?
Why Seasoning Cast Iron Matters For Everyday Cooking
Why does seasoning matter so much for cast iron? Most people assume it’s just about making pans look pretty — but the truth is, it’s all about performance. When you skip regular seasoning, you’re not just risking sticky breakfasts or uneven browning. You’re leaving your cookware exposed to rust and unpredictable results every time you cook.
Picture this scenario: you’re flipping pancakes for a weekend brunch, but they stubbornly cling to the surface, leaving burnt bits behind and making cleanup a nightmare. That’s what happens when the seasoning — the tough, nearly invisible layer of polymerized oil — starts to fade. According to the Lodge Cast Iron official care guide, consistent seasoning is the single most important step to keeping cast iron non-stick, easy to clean, and protected for decades.
💡 Pro Tip: Each time you cook with oil, you’re slowly reinforcing that seasoning layer — but deeper, deliberate seasoning sessions build more resilience. Don’t just rely on “cooking as seasoning.”
The Science Behind the Shine
So, what’s actually happening on the pan’s surface? Seasoning is a kind of “controlled burn” — oils break down and bond to the iron, creating a hard, slick shell. This isn’t just marketing lingo from cookware brands. The American Culinary Federation explains that seasoned cast iron can handle higher temperatures than many non-stick competitors, and it only gets better with use.
- Barrier Protection: Shields from moisture and oxygen — less rust, more durability.
- Natural Non-Stick: Makes food release easy, especially for eggs or delicate fish.
- Flavor Development: That well-used pan? It actually lends subtle complexity to dishes over time.
In practice: a chef-seasoned skillet passed down generations often needs far less oil and yields a more consistent sear than a brand-new, unseasoned one. That seasoning becomes a culinary legacy — you can taste (and feel) the difference.
| Benefit | With Seasoning | Without Seasoning |
|---|---|---|
| Stick Resistance | High (natural non-stick) | Low — food clings |
| Rust Resistance | Excellent barrier | Prone to corrosion |
| Flavor Impact | Enhances over time | Neutral or metallic |
Food you love, cleanup you don’t dread — and a skillet that gets better each year. But there’s one detail most owners completely overlook until it’s too late…
How To Spot When Your Cast Iron Needs Reseasoning
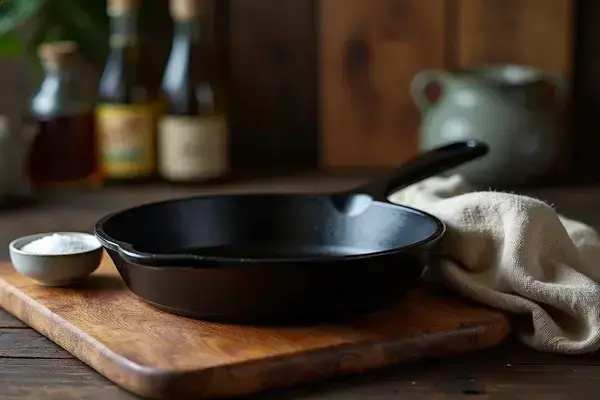
How do you really know when your cast iron pan needs a fresh round of seasoning? There’s no blinking light or alarm — but your skillet sends clear signals if you know what to look for. A perfectly seasoned cast iron should show a deep, even luster (almost like black satin) and rarely lets food stick. Anything less, and it’s time to pay attention.
You might notice a few frustrating clues during daily cooking. Food clings stubbornly. Rusty spots or orange stains start appearing after a wash, even if you dried everything by hand. Maybe there’s a rough, dry texture across some patches, or a dull gray color where the black used to be. According to the Cookware Manufacturers Association, all these symptoms point toward a weakened seasoning layer — and a pan that’s due for some TLC.
⚠️ Important Warning: Avoid using harsh soaps, steel wool, or soaking your skillet for long periods. These can strip away seasoning far quicker than normal use — and you’ll end up having to reseason much sooner.
Key Trouble Signs
- Stubborn Sticking: Eggs, pancakes, or fish that glue themselves to the surface? That’s your first indicator.
- Surface Rust: Tiny flakes or red-orange spots, especially after storage or contact with water.
- Dull or Discolored Areas: If your skillet looks more cloudy gray or brown instead of a rich black, the seasoning’s thin or gone.
- Roughness and Flaking: Food bits get trapped in texture, or the surface flakes when rubbed.
- Unpleasant Smells: A properly seasoned pan should never smell sour or metallic, even when empty.
In practice: after a week of heavy tomato sauce or several high-heat steak sears, you may spot one edge of your skillet turning a little pale or slightly sticky. If two or more of these clues show up together, don’t wait — you’ll want to act fast before rust sets in.
| Sign | What It Means | Action Needed |
|---|---|---|
| Sticking | Worn seasoning | Light touch-up or reseason |
| Rust | Lost barrier | Full reseason ASAP |
| Dullness | Patchy polymerization | Spot-treat and bake oil layer |
Once you can spot these trouble signs, you’re way ahead of the curve. And this is exactly where most people make the most common mistake…
Step-By-Step Guide To Seasoning Cast Iron Properly
Think seasoning cast iron is some mystical process only chefs can master? Honestly—it’s way simpler than most novice cooks imagine. The real key is knowing the exact steps and following them each time, so you build up that slick, non-stick surface your skillet deserves.
- Bare or stripped cast iron pan (cleaned thoroughly)
- High-smoke point oil (flaxseed, grapeseed, or canola)
- Paper towels or a lint-free cloth
- Oven (capable of 450°F-500°F)
- Aluminum foil (for oven rack)
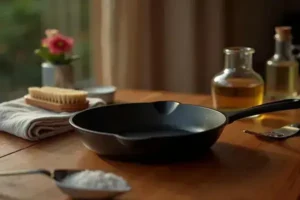
- Prep Your Skillet: Scrub the pan with hot water and a stiff brush. Dry thoroughly—water is seasoning’s enemy.
- Apply Oil: Pour a small amount of oil (about a teaspoon) onto the pan. Using a paper towel, rub a thin layer all over, including the handle and bottom.
- Buff Till Barely Shiny: Wipe off excess oil until the surface almost looks dry—too much oil leads to a sticky finish, not protection.
- Heat It High: Place the pan upside-down in a preheated oven at 475°F (245°C). Use foil below to catch drips. Bake for 60 minutes.
- Cool Gradually: Let the skillet cool in the oven. For a durable ‘factory’ finish, repeat this process 2-3 more times.
💡 Pro Tip: According to America’s Test Kitchen, using too much oil is the #1 reason seasoning becomes tacky. A nearly invisible film is enough to do the job right and keeps your pan from getting gummy.
Picture this scenario: you finish the last bake, pull the pan out, and—magic—eggs that once clung stubbornly now slip and slide like a true nonstick. That satisfaction? Totally earned.
| Oil Type | Smoke Point | Finish |
|---|---|---|
| Flaxseed | High (450°F) | Hardest, but can flake |
| Canola | Very High (470°F) | Durable, easy to find |
| Grapeseed | High (420°F) | Stable, mild taste |
What actually works might surprise you…
Best Practices For Maintaining Seasoned Cast Iron
Have you ever wondered why some skillets age beautifully while others quickly lose their magic? The reality is, maintaining seasoned cast iron isn’t just about sporadic care—it’s a set of small habits that add up fast. Treat your pan right and it’ll reward you with decades of reliable performance and flavor.
- Clean Quickly: Always wash your skillet right after use. Use hot water and a gentle brush or sponge—skip the soap when possible.
- Dry With Heat: Don’t let moisture linger. Place the pan on a burner for a minute or two post-cleaning to drive off hidden dampness.
- Add Oil: Wipe a drop of neutral oil over the warm surface before storing. This tiny ritual keeps the seasoning layer strong, according to the Lodge Cast Iron Care Guide.
- Avoid Acidic Foods: Tomatoes and vinegar-heavy recipes can break down seasoning. Moderate use is fine, but don’t simmer spaghetti sauce for hours on the first few layers of seasoning.
- Store Dry and Open: Let your skillet breathe. Trapping moisture under a lid invites rust, so let air circulate freely around it.
💡 Pro Tip: Instead of paper towels, try wiping your pan with a lint-free cotton cloth. It’s more sustainable and won’t leave fibers behind—plus, you’re less likely to miss a spot.
Picture this scenario: after whipping up cornbread, you pour out the crumbs, rinse with hot water, and return the pan to low heat. A swipe of oil, a gentle rub, and that glossy black finish gleams right back at you—ready for next time without any drama.
| Do | Don’t | Why |
|---|---|---|
| Rinse with hot water | Soak for hours | Soaking strips seasoning |
| Dry by heating | Air dry or towel dry only | Heat removes stubborn moisture |
| Apply thin oil layer | Store bone dry | Oil preserves protection |
And honestly? These tiny steps are all it takes to keep your investment in top form. But there’s one detail most owners completely overlook until it’s too late…
Troubleshooting Common Cast Iron Seasoning Problems
Every cast iron cook hits a snag sooner or later—maybe your skillet’s tacky, maybe it smells weird, or maybe it’s gone from glossy black back to rusty orange overnight. The good news: most seasoning issues have a clear fix. You just need to know what to look for.
- Sticky or Tacky Finish: This usually means too much oil was left before baking, or the oven wasn’t hot enough. The fix? Scrub the sticky surface gently with coarse salt, rinse, and repeat the seasoning cycle—but use much less oil.
- Patchy or Flaking Surface: Flaking often signals built-up layers of uneven polymerized oil or using oil with too low a smoke point. America’s Test Kitchen recommends stripping the pan and starting fresh if flakes appear.
- Rust Returning After Use: Rust almost always sneaks in if your pan isn’t completely dry before storage, or if it gets stored damp in a humid spot. Remove rust with a scrubby sponge or raw potato and kosher salt, then go back to a full reseason cycle.
- Sour or Metallic Odors: Lingering food smells or metallic notes mean you might’ve missed a thorough clean or exposed bare iron. Deep clean, heat to dry, then oil and rebake.
⚠️ Important Warning: If your pan develops severe rust or deep pitting, check manufacturer guidelines (Lodge or Staub, for example). Some industrial rust removers or electrolysis are safe, but only for advanced users and never on enameled cast iron.
Quick Cast Iron Rescue Table
In practice: imagine finishing a chili, scrubbing with soap by mistake, and waking up to rusty spots around the edge. It’s frustrating, but not permanent. With the right treatment, even major seasoning slip-ups are fixable.
| Problem | Likely Cause | Fastest Solution |
|---|---|---|
| Sticky finish | Too much oil/baked too low | Scrub and reseason with less oil |
| Rust spots | Moisture left after washing | Remove rust, dry, re-oil, bake |
| Uneven color/patches | Incomplete seasoning | Spot season and rebake |
Once this is in place, the rest of the routine falls into place naturally.
Your Cast Iron Confidence Starts Here
If you take just one thing from this guide, let it be: knowing exactly how often to season cast iron makes the difference between a sticky, rusty hassle and a pan that works like a dream. Keep an eye on the finish, use just the right amount of oil, and treat that skillet with a little care every time. Those habits matter most.
Maybe seasoning felt confusing before, or you worried a mistake could ruin your pan. Now, you’ve got a step-by-step plan in your pocket. Mistakes? Totally fixable. Suddenly, you’re in control—ready to serve up fried eggs or steak without fear of sticking or rust.
Which cast iron tip are you putting into practice tonight—maybe reseasoning, a gentle cleaning, or something else? Let us know in the comments! 🍳

Blake Aaron Mercer is a cast iron cookware enthusiast and home cook dedicated to helping everyday people get the most out of their skillets, Dutch ovens, and griddles. With years of hands-on experience seasoning, restoring, and cooking with cast iron, Blake built Hnnew to be the honest, practical cast iron resource he always wished existed when he was starting out.