Ever pulled your cast iron out and noticed uneven seasoning or stubborn patches that just won’t seem to bake smooth? You’re not alone. Choosing the right oil is what separates a glossy, nonstick surface from a pan that drives you crazy.
It’s frustrating—after all the effort to season, your eggs still stick, your cornbread tastes off, or your skillet turns blotchy. That’s not just annoying; it wastes your time, ruins your food and can shorten the life of a good pan. There’s a lot riding on this simple choice.
By the time you finish, you’ll know exactly which oils give you lasting results—and which ones only cause trouble. You’ll have a clear, confident answer to the best oil to season cast iron guide, and a kitchen workhorse that truly performs. Ready for the real truth behind those shiny skillets? Let’s go deeper.
Why The Oil You Use Matters For Cast Iron
Ever wondered why your cast iron pan goes from shiny to sticky—or even rusty—despite your best efforts? The oil you use for seasoning isn’t just a background detail; it’s the make-or-break factor that determines the pan’s performance, longevity, and flavor profile for years to come.
Cast iron is naturally porous. When you heat oil past its smoke point, it undergoes a process called “polymerization.” That’s just a fancy way of saying the oil bonds to the iron, forming a durable, non-stick layer you can count on. But not every oil behaves the same way under high heat—some harden beautifully, others turn tacky, while a few even create weak spots that flake off with use.
💡 Pro Tip: According to Lodge Manufacturing, the oldest cast iron skillet producer in America, oils with a high amount of unsaturated fats (like flaxseed) create the firmest seasoning, while saturated animal fats tend to leave softer, less durable finishes. Choose wisely if you want your pan to last decades.
Here’s the thing: it’s not just about which oil you pick, but how it interacts with your daily cooking. Each type of oil brings a unique smoke point, flavor residue, and impact on rust prevention. Missteps here can lead to disappointment—no one wants to scrub off sticky gunk or taste yesterday’s bacon in their pancakes.
| Oil Type | Seasoning Quality | Long-Term Impact |
|---|---|---|
| Flaxseed Oil | Hard, glossy finish | Best for durability |
| Canola Oil | Good, slightly soft layer | Resists everyday wear |
| Lard/Animal Fat | Rich, soft layer | Needs frequent touch-ups |
Picture this scenario: You faithfully swipe your skillet with olive oil—everyone calls it ‘healthy’ after all. Within weeks, the pan feels sticky, pancakes cling, and the glossy look fades. Why? Olive oil’s low smoke point means it never truly bonds in the oven, leading to a gummy mess instead of a silky polymerized surface.
Leading experts like America’s Test Kitchen advise choosing oils with higher smoke points and fewer additives, so your hard work actually pays off in the kitchen.
But there’s one detail most owners completely overlook until it’s too late…
How To Properly Season Your Cast Iron Step By Step
Seasoning your cast iron well is the difference between a pan that performs flawlessly and one that constantly frustrates. But how should you actually do it—what’s the best method that experts and real home cooks trust?
- Items Needed:
- Cast iron pan (clean and dry)
- Paper towels or lint-free cloth
- Your chosen oil (flaxseed, grapeseed, or canola are best)
- Oven (or grill, as an alternative)
- Aluminum foil (to catch drips)
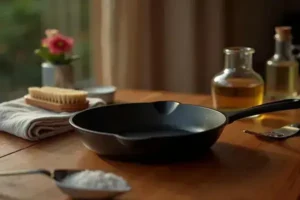
- Scrub and Dry: Start with a clean surface—use hot water and mild soap only if the pan is brand new or rusty. Dry it thoroughly with heat; water left behind can cause rust.
- Add a Thin Layer of Oil: Pour a small amount of oil on the pan. Using a towel, coat every inch—inside, outside, and handle. Too much oil causes sticky build-up, so wipe off until the surface only looks slightly glossy.
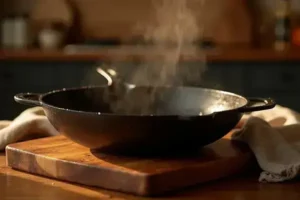
- Bake Upside Down: Place the pan upside down on the oven’s top rack. Lay foil on the bottom rack to catch drips. Heat at 450°F (232°C) for one hour. This high temp helps the oil bond, not just cling, creating a lasting nonstick finish.
- Let Cool, Repeat: Allow the pan to cool in the oven. Experts recommend seasoning 2-3 times for a robust coating—especially on brand-new pans or after a deep clean.
- Store with Care: Once cooled, store in a dry place. Don’t stack with other pans until the seasoning is hard and slick to the touch.
💡 Pro Tip: America’s Test Kitchen recommends brushing a final, super-thin film of oil over the pan surface after each use, then heating briefly on the stove—this micro-seasoning builds the strongest layer over time.
In practice: imagine you’ve just restored a flea-market cast iron gem. You’ve scrubbed away the rust, but now you’re staring at a dull gray surface, unsure how to transform it. Step by step, you follow the process above—and by the third oven cycle, the pan gleams. Scrambled eggs slide out without a fight, and cleanup is a breeze. The difference is like night and day.
But here’s what most people make the most common mistake with—using the wrong oil right at this step or skipping the wipe-down before baking…
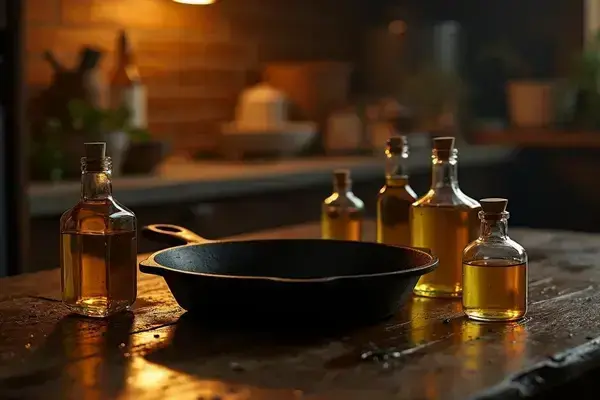
Best Oils Ranked: Pros, Cons And Surprising Results
Which oil really delivers the best possible seasoning on cast iron—one that’s hard, glossy, and not at all sticky? There’s a lot of debate in the cooking world: some swear by flaxseed for its tough finish, while others stick to affordable staples like canola or even traditional lard. But what does the science (and lived experience) actually show?
| Oil | Pros | Cons |
|---|---|---|
| Flaxseed oil | Highest unsaturated fat for firm, glossy layer; dries quickly | Expensive, can be brittle if overapplied, strong scent when baked |
| Canola oil | Affordable, neutral flavor, reliable non-stick surface | Thinner coating, needs more frequent touch-ups |
| Grapeseed oil | High smoke point (420°F), clean finish, widely available | Sometimes leaves uneven patches, mild flavor may linger |
| Lard/Animal fat | Classic Southern finish, great initial coverage, rich color | Spoils if not fully polymerized, softer coating, can go rancid in humid climates |
💡 Pro Tip: According to the Culinary Institute of America, seed oils with high polyunsaturated fat content (like flaxseed and grapeseed) create stronger, longer-lasting bonds with cast iron than saturated animal fats. But don’t forget: oven temperature and oil thickness matter just as much—use a barely-there layer for best results.
Picture this scenario: you’re seasoning a skillet before a big weekend breakfast. You’ve heard flaxseed oil is “the best,” so you brush it on generously. After three oven sessions, a shell-like finish appears—but a week later, it chips. Next time, you try canola: it goes on smooth, stays put, and holds up to daily eggs, even if it’s not as mirror-bright. Sometimes, practical wins over perfection.
- Best for Everyday Use: Canola or grapeseed—budget-friendly and predictable, great for people who cook with cast iron several times a week.
- Best for Showroom Shine: Flaxseed—if you have the patience to do it right and repeat seasoning cycles.
- Tradition Over Trend: Lard, if you love Southern flavor or want to keep things old-school (just store your pan dry).
What actually works might surprise you…
Oils You Should Avoid When Seasoning Cast Iron
You might be tempted to reach for whatever’s handy on your kitchen shelf, but not every oil is cut out for seasoning cast iron. Some oils bring hidden problems — stickiness, rancid odors, even a stubborn residue that never seems to go away.
- Olive Oil: Its low smoke point means it burns before it bonds, turning sticky or gummy after just a few oven cycles.
- Butter: Yes, it adds great flavor on food, but with its dairy solids and water, it creates a weak, patchy finish that doesn’t hold up.
- Coconut Oil: Despite its natural appeal, it contains saturated fats that form a softer, inconsistent film prone to flaking off—especially if you live somewhere humid.
- Vegetable Shortening: Often leaves a greasy or waxy coating that’s tough to build upon and can actually trap moisture, leading to rust.
⚠️ Important Warning: According to Lodge Cast Iron and The Culinary Institute of America, oils containing additives, dairy solids, or with a smoke point under 400°F should always be avoided. These options can make your cast iron seasoning frustrating, instead of effortless.
In practice: imagine pulling out your skillet for Saturday pancakes. You used a thick layer of coconut oil last month because it seemed healthy. Now, the pan smells odd, and pancakes cling worse than ever—plus there’s a gritty resin that won’t wash off. Cleaning gets tedious and the nonstick layer is ruined, all because of the wrong oil.
Here’s the thing—oils that polymerize cleanly (like flaxseed or grapeseed) outperform “multi-purpose” ones, which were never intended for high-heat jobs. When in doubt, stick to pure oils with high smoke points and zero additives for a pan that rewards your effort, not punishes it.
And this is exactly where most people make the most common mistake—thinking all oils are ‘close enough’. Up next, see what to do when things go wrong and how to rescue your cast iron if it’s already sticky or flaky…
Troubleshooting Sticky Or Flaky Cast Iron Surfaces
Sticky or flaky cast iron surfaces aren’t just annoying—they can ruin your favorite skillet and dampen your cooking joy. So what’s really going on when your pan doesn’t feel slick anymore? It usually boils down to oil type, application thickness, oven temperature, or hidden food remnants left behind.
- Scrub Away the Old Layer: Wash the pan with hot water, a dab of mild soap (yes, it’s okay for emergencies), and a stiff brush or chainmail scrubber. Dry completely on low heat.
- Assess: Sticky or Flaky? Sticky means too much oil or it wasn’t hot enough to polymerize. Flaky means excess oil baked in layers that didn’t adhere—or breakdown from frequent temperature swings.
- Remove Any Loose Flakes: Use a plastic scraper or non-abrasive pad to lift away bits. A round of coarse salt can help with stubborn spots.
- Thinly Re-oil: Apply a minimal amount of high-smoke-point oil (like grapeseed or canola)—just a sheen, not a pool.
- Re-bake at 450°F: Place the pan upside down in an oven preheated to 450°F (232°C) for one hour with a sheet of foil below. This time, let it cool in the oven for slow, even hardening.
💡 Pro Tip: According to Lodge Cast Iron and Serious Eats, patience is key—several thin seasoning cycles work better than a single thick one. It’s less glamorous, but far more effective for reliable, long-lasting surfaces.
In practice: you pull out a skillet after Sunday’s roast and find its surface feels like a sticky Post-it note. No matter how hard you scrub, it isn’t right. After following these steps (and resisting the urge to lather on more oil), the third bake finally leaves a hard, slick patina. Next time, you use a drop of oil and nothing sticks—not even scrambled eggs. That’s the moment cast iron pays you back for your patience.
The right habits in place now make everything easier from here.
Your Cast Iron, Ready for Anything
If you take just one thing from this best oil to season cast iron guide, let it be: the right oil and method can make any cast iron truly non-stick and last for decades. We broke down which oils work, which ones to avoid, and exactly how to troubleshoot sticky or flaky pans.
Before, you might’ve struggled with mystery sticking, uneven seasoning, or just never felt confident about your pan. Now you know which oils give a durable finish, how to season like a pro, and even how to fix mistakes fast. It feels good to turn a problem pan into your kitchen’s MVP, doesn’t it?
What surprised you most about the seasoning process—or which oil are you excited to try first? Share your cast iron wins (or questions) in the comments below!

Blake Aaron Mercer is a cast iron cookware enthusiast and home cook dedicated to helping everyday people get the most out of their skillets, Dutch ovens, and griddles. With years of hands-on experience seasoning, restoring, and cooking with cast iron, Blake built Hnnew to be the honest, practical cast iron resource he always wished existed when he was starting out.