Picture this: you’re sizzling bacon in your cast iron skillet, but the edges are crisp while the center stays disappointingly soggy. It’s enough to make anyone question if they’re using this classic pan right—or at the right temp.
The thing is, guessing the heat level on cast iron doesn’t just mess with flavor; it means uneven cooking, burnt bits, and that sinking feeling when dinner fails. No need to feel bad—most home cooks struggle with knowing how hot is hot enough (or too much) for cast iron cooking.
Here’s the thing: by the end of this guide, you’ll know exactly how to master cast iron temperature guide cooking for flawless results every time—whether you’re searing a steak, roasting veggies, or baking cornbread. Ready to turn down the stress and turn up the flavor? Let’s get into the heat zones that make all the difference.
Understanding Heat Zones On Cast Iron
Ever tried cooking steak in your cast iron and wondered why the edges crisp up faster than the center? That’s the magic—and sometimes the frustration—of cast iron heat zones in action. Unlike thin stainless pans, cast iron heats slowly but retains and distributes energy for a long time. The result: powerful surface heat, but also unique hot and cool zones that matter much more than most home cooks realize.
So, what’s really going on beneath the surface? When you preheat a cast iron skillet, it doesn’t warm up evenly from the get-go. Areas directly above your burner (or oven’s hottest spot) get hotter, while edges might lag behind. The size and power of your burner, the skillet’s thickness, and even your stove type all influence these zones. According to the experts at America’s Test Kitchen, preheating for a full 10 minutes is key if you want the closest thing to even radiant heat—especially when searing protein.
| Zone | Location in Pan | Ideal Use |
|---|---|---|
| Center Hot Spot | Directly over burner | Searing steaks, charring peppers |
| Mid Zone | Inner sides of skillet | Sauteing onions, frying eggs |
| Outer Edge | Near rim and handles | Simmering sauce, warming tortillas |
Picture this scenario: You’re prepping smash burgers for dinner. You drop a patty dead center—sizzle city! But try to cook three at once, pushing one to the rim, and it’s oddly pale and barely browning. That’s zone heating at work. Seasoned makers like Lodge Cast Iron recommend shifting food and rotating pans to balance the effect—because even the best skillet can’t cheat physics.
💡 Pro Tip: To test your pan’s heat zones, sprinkle a pinch of flour over the surface as it preheats. The flour will brown first in the hottest areas, revealing where to place your food for a perfect sear.
This hands-on approach transforms guesswork into skill. As you start recognizing your skillet’s unique “map” of hot spots, you gain real control—whether you’re aiming for a golden crust or gently simmering sauce at the edge. And this is exactly where most people make the most common mistake…
Best Temperatures For Meats, Veggies & More
Ever found yourself guessing if your skillet is really hot enough for that perfect steak, or worried the veggies will turn mushy? The truth is, different foods demand different temperatures on cast iron—and knowing them puts you in control, not your pan.
According to guidelines from the USDA and food science authorities like America’s Test Kitchen, master home cooks use an instant-read thermometer to check that magic number. No more “hand hover” guesswork. Let’s lay out the most reliable temperature targets, so you know exactly what to aim for every time you heat that skillet.
| Food Type | Ideal Surface Temp | Why It Works |
|---|---|---|
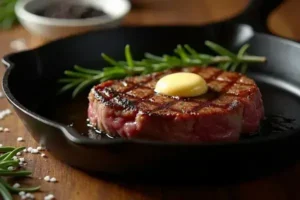
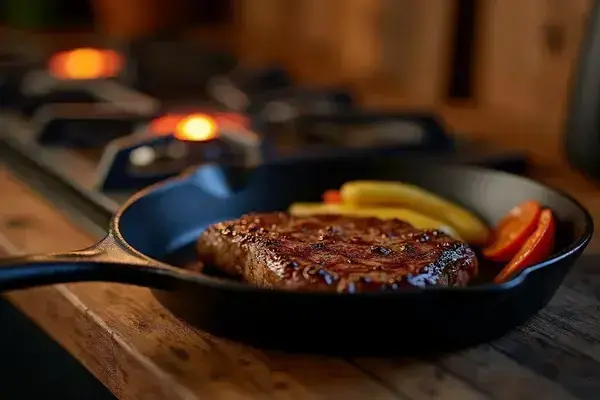
| Steak & Burgers | 400–450°F (204–232°C) | High heat = deep sear, juicy center |
| Chicken Breasts | 375–400°F (190–204°C) | Even browning, juicy not dry |
| Fish Fillets | 350–375°F (177–190°C) | Keeps delicate flesh from sticking |
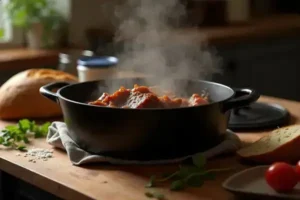
| Vegetables | 325–375°F (163–190°C) | Prevents burning, preserves texture |
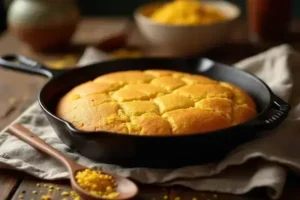
| Bread & Cornbread | 375–425°F (190–218°C) | Creates a crisp, golden crust |
In practice: Say you toss asparagus into a pan still sizzling from steak cooking—a classic move for speed, but the temp’s way too high. Veggies hit the surface and char before softening. If you let the pan cool to around 350°F, you’ll get caramelization without scorch marks every time.
- Steak: Only add meat when oil just begins to smoke—it’s your visual cue that 400°F+ has arrived.
- Eggs: Wait until a water droplet dances, not sizzles and pops. That’s about 320–350°F, perfect for gentle cooking.
- Bread: Preheat longer for an even crust. Use an oven thermometer placed inside the skillet for reliable readings.
💡 Pro Tip: If you don’t have a thermometer, flick a few water droplets onto the skillet. Slow sizzle = medium heat, quick evaporate with dance = high. It’s a restaurant trick endorsed by Culinary Institute of America instructors.
But there’s one detail most owners completely overlook until it’s too late…
How To Test And Monitor Surface Heat
How do you really know if your cast iron is hot enough? If you’ve ever hovered your hand over the pan, hoping it’s “about right,” you’re not alone. But restaurants, culinary schools, and experienced home cooks all rely on simple—but effective—methods to test and monitor surface heat with way more confidence than guesswork allows.
- Gather Your Tools: You’ll get the best results with an instant-read infrared thermometer. Don’t have one? No worries—the classic water droplet test or a small sprinkle of flour work surprisingly well too.
- Preheat the Skillet: Place the pan over medium or medium-high heat for at least 5–10 minutes. This ensures even, stable heat retention—a signature strength of cast iron according to the Culinary Institute of America.
- Test With Water: Flick a few drops of water onto the surface. If they bounce and sizzle, you’re around 350°F. If they instantly evaporate, that’s 400°F or higher—perfect for that steak sear.
- Check With Flour: Sprinkle a pinch of flour on the pan. When it browns in less than five seconds, you’ve hit high heat; eight seconds means medium.
- Use a Thermometer: For the highest accuracy, aim an infrared thermometer at various points on the skillet and look for consistent readings matching your recipe’s recommendation.
Picture this scenario: You’re about to fry eggs and want them sunny-side up, not rubbery. You do the water test and see droplets sizzle for 2–3 seconds—just right for tender whites and runny yolks every time.
- Instant-read thermometers: Speed, digital display, easy calibration.
- Water & flour: No gear needed, fast feedback.
- Oil shimmer: Add oil and look for a wavy sheen before adding food—another pro restaurant trick.
⚠️ Important Warning: Never add oil until the skillet is preheated. Doing so can cause the oil to break down, create off-flavors, and make future seasoning tougher to maintain, as noted by Lodge Cast Iron and America’s Test Kitchen.
What actually works might surprise you…
Common Mistakes When Cooking With Cast Iron
Think your cast iron woes are unique? The truth is, even kitchen pros make classic mistakes that can wreck a beautiful skillet meal. Recognizing these can save you time, money, and a lot of scrubbing.
- Skipping the Preheat: Cast iron requires a solid, even preheat—usually at least 5 minutes—before adding any food. A cold pan means sticking disasters every time. America’s Test Kitchen notes this step as a top reason for poor results in home kitchens.
- Too Much Oil, Too Soon: Pouring oil into a cold pan leads to sticky, uneven seasoning and off-tasting finishes. Always add fats after the pan is already hot and ready to go.
- Overcrowding the Pan: Fill it with food, and you end up with steamed, pale results instead of golden crusts. Allow space for air and radiant heat to work.
| Mistake | Consequence | How to Fix |
|---|---|---|
| No Preheat | Food sticks, uneven cooking | Heat for 5-10 min before use |
| Cold Oil | Sticky build-up, weird aftertaste | Add oil to fully preheated pan |
| Overcrowding | Pale, soggy results | Cook in smaller batches |
| Soap-Washing | Strips seasoning, rust risk | Use coarse salt for cleaning |
| Sudden Temperature Swings | Warping, cracks | Always let cool before washing |
Picture this scenario: You pull a pan-seared chicken breast from your skillet, but instead of a crisp golden crust, you’re stuck scraping shreds off the bottom. Why? The pan wasn’t hot, and maybe you used cold oil. You’re not alone—this is the number one complaint fielded by customer service reps at Lodge Cast Iron.
💡 Pro Tip: After cleaning, dry your skillet on the stove with a low flame for a few minutes—then wipe on a thin coat of high-smoke-point oil (like grapeseed or canola) to protect your seasoning and prevent rust.
And this is exactly where most people make the most common mistake…
Pro Tips To Save Your Skillet From Ruin
Wondering how some skillets last for generations while others end up rusty within a year? The truth is, it’s rarely luck. The difference comes down to a few expert habits that protect cast iron from disaster—and make every meal easier, tastier, and safer.
- Always Dry Thoroughly: After washing (never soak!), return your skillet to low heat on the stove. The gentle warmth evaporates lingering moisture, preventing invisible rust before it starts.
- Season Regularly: Wipe on a thin layer of high smoke-point oil (like grapeseed or flaxseed) with a paper towel. Heat until it smokes lightly, then let it cool—this bonds a protective nonstick layer stronger than any factory finish.
- Avoid Acidic Foods Early On: Tomato sauces and vinegars can eat away at far-from-perfect seasoning, especially in new pans. Wait until seasoning is well established before getting adventurous.
- Store Smart: Tuck a dry paper towel between pan and lid to absorb humidity. If you stack with other pans, place a towel or pan protector in between to safeguard the finish.
- Address Rust Quickly: Minor rust? Scrub gently with fine steel wool and re-season right away. Major rust? Check official guidance from the Lodge Cast Iron company or the USDA’s cast iron care fact sheets before using again.
In practice: Picture this scenario—after a late-night cook, you rinse your skillet and leave it in the drying rack, figuring it’ll be fine for morning. By breakfast, you see orange streaks creeping along the rim. If you’d just dried it over a burner for two minutes, all that drama disappears.
💡 Pro Tip: After oiling and cooling, rub the cooled pan with a clean paper towel—if there’s any sticky residue, you’ve used too much oil. Less is always more for a glass-smooth finish, according to America’s Test Kitchen and the Culinary Institute of America.
Once this is in place, the rest of the routine falls into place naturally.
Your Cast Iron Confidence Starts Here
If you take just one thing from this guide, let it be: knowing your skillet’s temperature zones and surface heat is the secret to stress-free, delicious cooking with cast iron. You’ve got practical tips, common mistakes to avoid, and real tools to master every meal—right down to protecting your pan for years to come with this cast iron temperature guide cooking.
Maybe cast iron felt unpredictable before. Food stuck, edges burned, and rust snuck up on you. Now? You know how to nail the right temp, prep like a pro, and keep your skillet gorgeous. A few smart habits make all the difference. Honestly, you’re miles ahead of where you started.
Which cast iron tip are you going to use first—testing heat, timing your preheat, or trying that pro seasoning trick? Share what you’re excited about in the comments below!

Blake Aaron Mercer is a cast iron cookware enthusiast and home cook dedicated to helping everyday people get the most out of their skillets, Dutch ovens, and griddles. With years of hands-on experience seasoning, restoring, and cooking with cast iron, Blake built Hnnew to be the honest, practical cast iron resource he always wished existed when he was starting out.