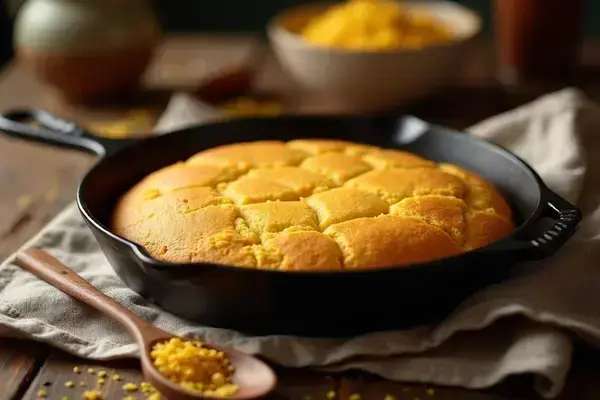
Picture this: you pull a sizzling, golden wedge of cornbread from a cast iron skillet and that first bite is pure comfort—steamy, buttery, crisp at the edge. If only it always worked out like that, right?
But here’s the thing—so many folks end up with crumbly disasters or sad, dry pucks. Sometimes, it’s the wrong pan. Sometimes, it’s the batter or oven tricks that nobody ever explains. And honestly? That disappointment doesn’t just ruin your meal; it can put you off homemade cornbread for good.
By the end of this guide, you’ll have everything you need to ace cast iron cornbread recipe guide techniques—pan tricks, pro tips, and easy flavor twists included. The path to perfect cornbread starts here, and next up: why your skillet isn’t just a vessel—it’s the secret weapon.
Why Cast Iron Makes Cornbread Better
Is cast iron just an old-school gimmick, or does it really elevate your cornbread above what you’d get from a basic aluminum or glass pan? That’s the question a lot of home cooks puzzle over—especially when craving those satisfyingly crisp corners and a golden, even bake, every single time.
Here’s the thing: cast iron isn’t just nostalgia. It delivers real science-backed benefits you can see, taste, and feel. First, the pan’s heavy mass absorbs and distributes heat more evenly than lighter materials do. You don’t get scorched spots or pale, soggy middles. And because cast iron gets blazing hot, it creates that famous crunchy, buttery exterior that’s nearly impossible to achieve any other way.
💡 Pro Tip: Always preheat your cast iron skillet in the oven for at least 10 minutes before pouring in the batter. The hot metal instantly sizzles the edges, locking in moisture and building that expert-level crust you crave. The Southern Foodways Alliance recommends this as the gold standard for cornbread texture.
In practice: picture this scenario—you’re finishing up your batter, the oven’s heating, and you slide that empty cast iron skillet onto the middle rack. After 10 minutes, the air smells almost metallic-hot. You pour in the batter and immediately hear that magical sizzle—it’s the difference between ‘just ok’ and restaurant-quality cornbread, right at home.
| Pan Type | Crust Texture | Heat Retention |
|---|---|---|
| Cast Iron Skillet | Deeply golden, extra crisp | Excellent—stays hot for even baking |
| Aluminum Pan | Pale, tender, often uneven | Poor—cools rapidly |
| Glass Dish | Soft, sometimes soggy | Average—uneven heat, risk of overbaking edges |
Worth noting, cast iron also imparts subtle mineral notes thanks to its seasoned surface—a plus for flavor lovers—while allowing beautiful presentation straight from oven to table. According to America’s Test Kitchen, properly seasoned cast iron is as nonstick as most modern pans, with durability lasting generations if cared for correctly.
And this is exactly where most people make the most common mistake…
Essential Ingredients And Prep Tips
What really separates jaw-droppingly good cornbread from the rest? It’s not just the skillet or the recipe — it starts with the ingredients and how you prep them. Too many people grab the lowest-priced cornmeal and skim nonfat milk, then wonder why their bread tastes flat or falls apart.
- Stone-ground cornmeal brings authentic crunch and deep maize flavor — look for whole-grain options where the germ is intact for extra buttery notes. Avoid ultra-fine, overly processed cornmeal if you want old-fashioned texture.
- Buttermilk isn’t just for tang; its acidity reacts with baking soda to create a light, airy crumb. In a pinch, mix regular milk with a splash of lemon juice and let it sit five minutes.
- Eggs and melted butter hold everything together and create tender richness, while a little sugar (if you choose) rounds out the corn’s earthiness without making it cake-like.
💡 Pro Tip: Sift your dry ingredients before combining to prevent lumps, and always melt butter gently — scorched butter turns bitter, while perfectly melted butter infuses subtle nutty depth. The National Cornbread Festival recommends this step for the fluffiest results.
In practice: set out all your ingredients an hour ahead — especially eggs and buttermilk. When they’re room temperature, they blend smoother and rise higher, so your finished loaf bakes up tall instead of squat and heavy. A little patience pays off with cloud-like slices.
| Ingredient | Role | Why It Matters |
|---|---|---|
| Stone-Ground Cornmeal | Main structure & flavor | Creates crunch & real corn taste |
| Buttermilk | Acidity & moisture | Lifts texture, adds tang |
| Butter | Richness and crust | Yields moist crumb, golden exterior |
Here’s the truth: even the best cornbread mix can’t save you from bland batter if you skip these essentials. And yet, it’s the sneaky prep habits — like gently folding (not beating) your batter, or letting it rest for five minutes before baking — that truly up your game.
But there’s one detail most owners completely overlook until it’s too late…
Step-By-Step Method For Golden, Moist Cornbread
If you’ve ever pulled out a pan of cornbread and wondered why it’s pale, dry, or falls apart, you’re not alone. The truth is, technique matters as much as ingredients—especially when you want those irresistible golden edges and a plush, moist crumb right in the middle.
- Time required: About 35 minutes, start to finish (including prep and bake).
- What you’ll need:
- 10- or 12-inch cast iron skillet
- Stone-ground cornmeal
- Buttermilk
- Eggs
- Baking powder & baking soda
- Melted butter
- Sugar (optional)
- Salt
- Preheat skillet: Place your empty skillet in the oven and heat to 425°F. A hot pan is the secret to that iconic, crispy edge.
- Whisk dry ingredients: In a bowl, gently mix cornmeal, flour, baking powder, baking soda, sugar, and salt. Sifting helps with even texture.
- Blend wet ingredients: In another bowl, combine eggs, buttermilk, and melted (not piping hot) butter.
- Mix wet and dry—gently: Pour wet into dry. Fold together with a spatula—stop as soon as you see no dry streaks. Over-stirring makes cornbread tough!
- Sizzle and bake: Remove the hot skillet, swirl in a tablespoon of butter, then pour in batter—it should sizzle as it hits. Bake for 20–25 minutes, until deeply golden and the center springs back.
⚠️ Important Warning: Use mitts for the hot skillet—don’t get distracted! The American Culinary Federation stresses this safety step for cast iron cooking.
In practice: picture pulling the pan from the oven. The batter bubbles as it hits, sending up a rich, toasty aroma. You cut that first wedge and the crust crackles under your knife—inside, it’s steamy and tender, never crumbly or dry.
What actually works might surprise you…
Common Mistakes (And What To Do Instead)
Ever spent time prepping everything for your cornbread—only to be met with a dry, crumbly mess or a gummy, flavorless middle? It’s a frustration that turns would-be bakers away from cast iron for good. But almost every classic misstep is totally fixable if you know what to watch out for.
- Using cold ingredients: Bringing eggs and dairy to room temp seems fussy, but cold batter in a hot pan leads to uneven texture and poor rise.
- Skipping skillet preheat: You can’t cheat this step! If your cast iron isn’t searing hot, you’ll miss out on that crispy crust and risk sticking.
- Overmixing batter: It’s easy to get carried away. A few lumps are fine—overworking develops gluten, giving you tough, chewy bread instead of tender crumb.
- Neglecting pan care: Rust or buildup from an unseasoned skillet taints flavor and causes sticking disasters. A clean, well-seasoned pan is your foundation.
💡 Pro Tip: Clean your skillet with hot water and a stiff brush—no soap!—and dry thoroughly using a towel. When still warm, rub a thin layer of neutral oil inside for longevity. The Lodge Cast Iron company advocates this method to keep pans nonstick and heirloom-ready.
| Mistake | Result | Fix |
|---|---|---|
| Cold batter | Dense, heavy loaf | Warm ingredients to room temp first |
| No preheat | Pale, soft crust | Heat pan in oven 10+ mins before baking |
| Overmixing | Tough, rubbery texture | Fold batter just until combined |
In practice: picture this scenario—you grab your skillet, pour in batter straight from the fridge, and it bakes up flat as a pancake. The difference when you let things reach room temp and use a roaring-hot pan? Night and day.
Worth noting, even seasoned cooks sometimes forget to refresh their pan’s oil coating after each bake. That’s what leads to sad, sticky cleanups and lost confidence. Instead, a few seconds with fresh oil maintains that pro-level ease and flavor.
And this is exactly where most people make the most common mistake…
Creative Add-Ins And Flavor Twists
Think classic cornbread can’t surprise you anymore? The real magic happens when you dare to riff—mixing in flavors that wake up old memories or spark brand-new cravings. You’re not bound to tradition, but the best creative add-ins always respect the balance of sweet versus savory and never overwhelm that beloved corn flavor.
- Cheese & Heat: Sharp cheddar or Monterrey Jack swirled into the batter, plus a handful of diced jalapeños for a Texas-style kick. Just a quarter cup of each goes a long way without weighing down your crumb.
- Fresh Herbs: Chopped chives, rosemary, or thyme brighten up every bite with their garden-fresh pop. Fold in a tablespoon right before baking.
- Smoky Bacon: Crisped bacon bits (about 4 strips, chopped) add depth and rich aroma—always add them after draining on paper towels so you don’t get greasy pockets.
- Honey & Corn Kernels: For those who lean subtly sweet, try a tablespoon of local honey and half a cup of fresh (or frozen) corn for bursts of juicy texture.
💡 Pro Tip: Sprinkle toppings like extra cheese or sliced peppers only in the last five minutes of baking. It prevents burning and gives your cornbread that irresistible, photo-worthy finish. The Culinary Institute of America recommends this late-in-the-game move to keep your custom flavors bold and beautiful.
| Add-In | Flavor Profile | Best Use |
|---|---|---|
| Cheddar & Jalapeño | Savory, spicy | Chili nights, taco spreads |
| Honey & Corn Kernels | Delicate, sweet | BBQs, picnics |
| Bacon & Herbs | Smoky, aromatic | Brunches, Southern feasts |
Picture this scenario: you’re tasked with bringing a side to the family cookout, and you arrive with a golden skillet of cornbread laced with gooey cheese and jewel-bright herbs peeking through. That first aromatic slice vanishes before the potato salad’s even touched—everybody’s wowed.
Once this is in place, the rest of the routine falls into place naturally.
Your Cornbread Skills Are Set
If you take just one thing from this cast iron cornbread recipe guide, let it be: the right pan and a few prep tricks quickly turn basic bread into something crave-worthy. Knowing why cast iron matters, mastering the essential ingredients, and testing creative add-ins are what truly make cornbread unforgettable every time.
Maybe you started out with so-so results or didn’t know why your bread came out dry. Now you’ve got hands-on steps, real pro secrets, and the confidence to try bold new flavors. The next batch you bake could be your best ever—moist, golden, bursting with flavor and pride. Your table’s about to get a serious upgrade.
Which add-in or tip are you most excited to use in your next cornbread? Share your twist or baking questions in the comments—we’re all ears!

Blake Aaron Mercer is a cast iron cookware enthusiast and home cook dedicated to helping everyday people get the most out of their skillets, Dutch ovens, and griddles. With years of hands-on experience seasoning, restoring, and cooking with cast iron, Blake built Hnnew to be the honest, practical cast iron resource he always wished existed when he was starting out.