Picture yourself at dawn, wrapped in a bit of fog, listening to firewood pop beneath a cast iron skillet—maybe with last night’s coffee warming up. There’s a magic to it, but nailing campfire meals isn’t as easy as those glossy Instagram posts make it look.
Too often, you end up with charred outsides, raw centers, or a pan that just won’t clean up. You watch your group dig into unevenly cooked eggs or blackened bacon, and honestly? That’s enough frustration to make anyone swear off outdoor cooking for good.
By the time you finish this cast iron camping cooking guide, you’ll have the tools and know-how to conquer open-fire meals with confidence. Ready to make every camp cookout memorable? Here’s where your outdoor chef story really starts.
Choosing The Right Cast Iron For Campsite Cooking
Which cast iron skillet actually stands up to roughing it in the wild? The truth is, not all pans are built for open-fire survival. Your choice impacts everything — from heat control to meal quality and ease of cleanup at the end of a long day outdoors.
Campers often debate between classic skillets, deep Dutch ovens, and newer reversible griddles. But how do their features measure up at camp? Durability and shape matter more than shiny new coatings or big brands. Let’s compare the main contenders side by side.
| Type | Best Use | Pros & Drawbacks |
|---|---|---|
| Traditional Skillet | Frying, sautéing, pancakes, eggs | Lightweight and versatile; limited for stews or baking |
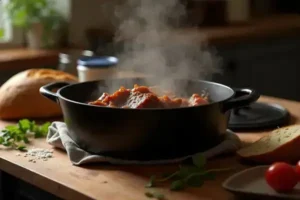
| Dutch Oven (Lodge/Staub) | Braising, baking, soups, roasting | Holds heat, does it all; bulky, needs two hands |
| Reversible Griddle | Meats, sandwiches, open-fire grilling | Large surface, grill lines; can be heavy, needs flat fire area |
💡 Pro Tip: According to the Outdoor Industry Association, a preseasoned Lodge or Camp Chef skillet offers the best balance of durability and price for most campers — they’re trusted by park rangers for a reason.
Picture this scenario: You haul a hefty Dutch oven up a rocky trail, only to find your campsite’s fire ring is too small for it. A classic 10-inch skillet would’ve been a packing game-changer, letting you cook breakfast and dinner without breaking your back (or your gear).
Besides size, pay serious attention to weight — anything over 7 pounds for a skillet or 12 pounds for a Dutch oven gets brutal to lug for more than a mile on foot. Also, avoid anything with complicated nonstick coatings. Those wear out fast over coals and are rarely recommended by manufacturers like Le Creuset for actual outdoor use.
- Choose preseasoned cast iron to skip initial seasoning hassles.
- Look for helper handles for easier lifting over fire.
- Basic lids beat fancy knobs (which melt in big heat).
- Opt for brands providing lifetime guarantees — a real sign of quality and trust.
Consult guides from Leave No Trace and REI for up-to-date gear lists and sustainability best practices. If in doubt about safe food contact surfaces, check for marks from the FDA or equivalent bodies in your region.
But there’s one detail most owners completely overlook until it’s too late…
Building And Managing The Perfect Campfire
Ever try whipping up breakfast over a stubborn fire that keeps sputtering out? That’s the kind of frustration most campers face — it’s not just about striking a match and piling on wood. Building the perfect campfire is a learned skill, and your cast iron depends on it.
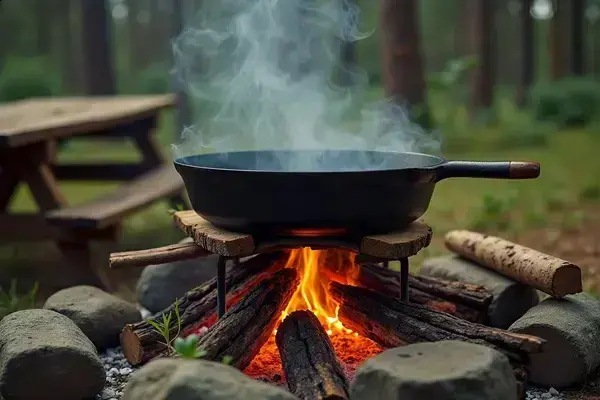
Successful campfire cooking starts with a steady, even bed of coals. Forget random flames licking at your pan. What you’re aiming for is controlled, radiant heat that allows you to actually cook food, not just char it. Here’s how you can nail it every time, even if you’re new out there:
- Choose the Right Spot: Pick a level area clear of low branches and dry brush. Most campsites provide a fire ring or grate for safety.
- Gather Three Wood Types: Tinder (dry grass/leaves), kindling (pencil-thick sticks), and fuelwood (wrist-sized logs). Resist the urge to use wet branches — they’ll just make smoke.
- Build a Solid Base: Arrange tinder in the center, lay kindling in a teepee or log cabin shape around it, then add two or three pieces of fuelwood nearby to warm up.
- Ignite and Nurse the Flame: Use matches or a fire starter (approved for outdoor use) and light the tinder. Gently blow at the base if needed. Let the flame catch onto the kindling before adding fuelwood gradually.
- Wait for Coals, Not Flames: Be patient — wait 20–30 minutes for a glowing bed of coals. That’s your heat zone for cast iron. Test by holding your hand above the coals; if it’s hot but not flaming, you’re ready.
Picture this scenario: You’re prepping dinner and rush to cook over wild, high flames. The skillet scorches your steak, but the inside stays raw. Next time, you wait for the coals — and suddenly every bite is perfectly cooked and evenly browned.
⚠️ Important Warning: According to the US Forest Service, never leave a campfire unattended. Always keep a bucket of water and a shovel close. Before you sleep or break camp, fully extinguish the fire — douse, stir, and repeat until cold.
- Hardwoods like oak and maple burn hotter and longer than softwoods — go for them if available.
- Use a long-handled metal tool or fire poker to arrange coals under your cookware.
- If you’re in a high-wind area, build a partial windbreak with rocks, but never fully enclose the fire.
There’s a confidence boost in mastering your fire setup — you’ll spend less time fussing and more time savoring your food. What actually works might surprise you…
Essential Cast Iron Techniques For Outdoor Success
What transforms a basic camp breakfast into something legendary? Mastery of just a few cast iron techniques — and honestly, most folks overlook them until they’re left scraping out stuck eggs for half an hour. If you want meals to slide out of the pan and impress your camp crew, it pays to get these fundamentals right.
- Preheating: Always warm your cast iron slowly over the coals before adding oil or food. Rushed heating creates hotspots and burned bits.
- Oiling: Once hot, swirl in a thin layer of high-smoke-point oil (like canola or grapeseed). It’s your shield against sticking and scorching.
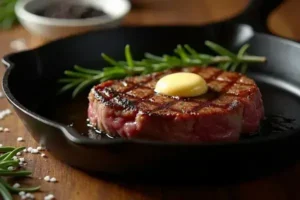
- Proper Searing: Don’t crowd the pan. Give food room so it browns, not steams. For steak or fish, pat it dry first — it really matters.
- Time Your Turns: Resist the urge to poke and flip constantly. Let food form a crust before moving it for that crave-able golden crisp.
- Lid Management: Use a lid for thick cuts, stews, or baking — you’ll trap heat and moisture, making cast iron act more like a portable oven. A heavy-duty aluminum foil sheet works if you’re packing light.
💡 Pro Tip: According to field tests by Backpacker Magazine, rubbing a pinch of kosher salt on a warm skillet with a folded cloth (no soap) scrubs off stuck bits without damaging seasoning — it’s a classic chef move outdoors.
Picture this scenario: You’ve got a group starving after a hike. Instead of wrestling bacon glued to the pan, your eggs and sausage glide out intact thanks to proper preheating and just the right amount of oil. Spirits stay high — and so does your camp chef reputation.
But if the weather’s rainy, or you’re camped at high elevation, heat levels can be deceiving. Bring a small infrared thermometer (they’re cheap, lightweight, and used even by the International Dutch Oven Society) to test your surface temp before cooking — aim for 375–425°F for most camp meals.
What actually works might surprise you…
Cleaning And Caring For Cast Iron In The Wilderness
Ever stare at a sticky, charred skillet after dinner and wonder, “How am I supposed to get this truly clean—without running water or harsh soap?” Here’s the thing: genuine cast iron care outdoors is about protecting flavor and longevity, not getting a mirror shine.
The big mistake? Thinking you need fancy products, or worse, scrubbing too hard and stripping away seasoning (that crucial nonstick layer you’ve worked for). In reality, the right tools and a little patience do all the heavy lifting. According to The Lodge Cast Iron Company and the National Park Service, the best results come from following these simple field-tested steps:
- Let It Cool, Not Cold: Wait about 10 minutes after cooking. Warm pans are easier to clean.
- Wipe Out Residue: Use a wooden spatula or folded paper towel to remove food chunks—no abrasive pads or metal tools.
- Scrub With Salt: Pour in a big pinch of kosher salt and a splash of water. Scrub gently with a camp rag or paper towel to lift stuck bits.
- Rinse & Dry Fast: Rinse briefly (a bit of water goes a long way). Immediately dry the pan over residual heat or a towel.
- Re-Oil—Lightly: Massage in a thin layer of oil with a paper towel while the pan’s still a bit warm. Don’t leave it greasy; a whisper of oil is all you need to keep rust at bay.
💡 Pro Tip: If you’re in a water-scarce spot, pack a small spray bottle for controlled rinsing, and let the pan finish drying upside-down near the campfire heat—not directly in the flames.
In practice: After a satisfying fireside meal, you clean up using just salt, a rag, and a slick of oil. Next morning? The pan is rust-free, its seasoning better than ever, and breakfast slides right off. There’s real joy in that ease.
- Avoid using dish soap or letting pans soak—both can ruin the seasoning outdoors faster than at home.
- If rust appears, use a bit more kosher salt and repeat oiling steps, but don’t panic—minor rust is reversible if caught early.
- Always store cast iron in a dry spot (a mesh bag works well) so no condensation ruins your hard work overnight.
And this is exactly where most people make the most common mistake…
Quick-Grab Campfire Recipes To Impress Your Crew
Ever want to be the campsite hero—the person whose food everyone crowds around for seconds? Here’s the thing: with cast iron and a handful of reliable recipes, you absolutely can. The trick isn’t fancy ingredients, it’s working with what fire, time, and cookware do best.
If you’re tired of charred hot dogs or sticky oatmeal, a few winning meals will keep spirits high and bellies happy. Below is a quick-access recipe table built for real-world camping (with or without a Dutch oven). Watch how these crowd-pleasers stack up:
| Recipe | Key Ingredients | Why It Impresses |
|---|---|---|
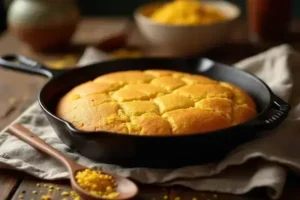
| Campfire Skillet Hash | Potatoes, sausage, onion, eggs | Feeds a group, hearty flavors, easy cleanup |
| Backcountry Bannock Bread | Flour, baking powder, milk powder, oil | Simple, quick bake, fresh bread feel anywhere |
| Open-Fire Peach Crisp | Canned peaches, oats, brown sugar, butter | Dessert on the trail, caramelized, crowd magnet |
💡 Pro Tip: For stick-free baking, line your Dutch oven with parchment paper or a foil sling—RECAMP Guides recommends this for perfect release and minimal mess.
In practice: Picture this scenario—a chilly morning, coffee in hand, and the sizzling sound of hash browns golden and crisp in your cast iron. There’s instant camaraderie around the fire (even picky eaters clean their plates).
- Skillet Hash: Brown diced potatoes and onions in a thin layer of oil. Add cooked sausage, make wells, and crack in eggs. Cover with a lid or foil, cook until eggs are just set—15 minutes.
- Bannock Bread: Mix dry ingredients at home. Add water at camp, knead, then press into a hot skillet with oil. Flip once golden, done in 10–12 minutes.
- Peach Crisp: Spread peaches in your (lined) Dutch oven. Top with oat, sugar, and butter mixture. Bake covered until bubbling and golden—about 30 minutes on low coals.
Swap out ingredients for local finds or dietary needs. And for campers with allergies, always double-check labels before packing supplies—advice straight from the American Camp Association. The right habits in place now make everything easier from here.
Your Campfire Meals Are About To Shine
If you take just one thing from this cast iron camping cooking guide, let it be: gear, fire skills, and simple techniques come together to make every outdoor meal easier (and a whole lot tastier). Choose the right cast iron, build a steady campfire, and clean up like a pro—these are the keys you need.
Before, camp cooking often meant a burned pan, cold centers, or sticky messes. Now? You know exactly how to set up, cook with confidence, and serve balanced campfire meals your whole crew will love. The difference is night and day. You’re not just feeding people at camp—you’re filling each trip with moments everyone remembers.
Which recipe or cast iron tip are you excited to try first around your next campfire? Tell us in the comments below—let’s make your outdoor cooking even better together!
Blake Aaron Mercer is a cast iron cookware enthusiast and home cook dedicated to helping everyday people get the most out of their skillets, Dutch ovens, and griddles. With years of hands-on experience seasoning, restoring, and cooking with cast iron, Blake built Hnnew to be the honest, practical cast iron resource he always wished existed when he was starting out.