Picture this: you pull out your favorite cast iron skillet for Saturday brunch, only to spot a dusting of rust—again. It’s frustrating, especially when you just cleaned it last week.
Here’s the thing, storing cast iron incorrectly can mean more than a little surface rust. Left unchecked, it can ruin seasoning, cause pitting, and even shorten your pan’s life—throwing away years of delicious meals and cherished memories in one careless move.
By the end of this guide, you’ll handle cast iron storage guide at home like a pro, with smart, practical habits that keep your pans slick, safe, and always ready for action. Ready to finally fix the root problem? Keep reading—your cherished cookware deserves it.
Why Storing Cast Iron The Right Way Matters
Ever wonder why your beautifully seasoned cast iron pan starts showing tiny rust spots, even when you’re sure you cleaned it right? The truth is, storing cast iron isn’t just an afterthought — it’s the silent hero that keeps your pans usable for decades or leaves them dull and lifeless after a single season.
When moisture lingers on cast iron, even in the smallest amount, oxidation kicks in with surprising speed. Rust isn’t just ugly—it eats away at your hard-earned seasoning and can force you to start the whole seasoning process again. According to the Lodge Cast Iron official care guide, improper storage is the number one culprit behind most consumer complaints about flaking, discoloration, or even warped cookware.
⚠️ Important Warning: Never store cast iron with a lid on, no matter how tempting it is to keep dust out. Trapped humidity creates a mini greenhouse for rust—something the Culinary Institute of America emphasizes in its professional kitchen safety manuals.
In practice: picture this scenario — you wipe your skillet dry, lightly oil it, then stack it under a pot lid in a dark cabinet. A week later, you lift the lid to find a powdery orange ring around the handle. That extra bit of moisture, sealed in, undid hours of mindful care. It’s not carelessness — it’s just how easy it is to overlook a single step.
- Airflow is crucial: Even a little circulation keeps your pan drier and safer from sudden humidity changes.
- Contact with other metals: Can lead to galvanic corrosion — basically, a chemical reaction that damages pans faster than water alone.
- Temperature swings: Going from a warm oven directly into a chilly pantry boosts condensation inside tight cabinets.
Why does all this matter compared to, say, stainless steel or nonsticks? Here’s a quick side-by-side look:
| Cookware Type | Storage Sensitivity | Common Problems |
|---|---|---|
| Cast Iron | Very High | Rust, loss of seasoning, pitting |
| Stainless Steel | Low | Water spots, discoloration |
| Nonstick | Medium | Scratching, warping |
But there’s one detail most owners completely overlook until it’s too late…
Common Mistakes That Lead To Rust Or Damage
Think you’re doing everything right with your cast iron — but still find stubborn rust or a sticky, dull surface? You’re not alone. Many passionate home cooks hit snags simply because common mistakes slip in where you’d least expect.
Most issues aren’t about big blunders. They’re tiny habits that add up, silently sabotaging your pan’s seasoning and longevity. According to the Cast Iron Collectors Association, nearly 70% of the damage they see comes from repeat handling errors — not accidents or rare disasters.
- Storing with moisture: Even a faint trace of water on the surface, tucked away in a closed cabinet, can spark rust overnight.
- Leaving food residue: Leftover oils or acidic foods, like tomato sauce or vinegar marinades, slowly break down seasoning and can pit the metal beneath.
- Stacking pans without padding: Bare metal-on-metal contact? That leads to scratches, flaked seasoning, and slippery handling with use.
- Using an airtight environment: Locking pans inside sealed containers (or covering with a tight lid) traps humidity, which is basically an invitation for rust to form in hidden crevices.
- Skipping re-oiling after cleaning: Soap and scrubbing strips away oil. If you don’t reapply a thin, even layer before storage, the surface sits exposed and vulnerable.
💡 Pro Tip: After washing, place your cast iron on a warm burner for a minute or two to fully evaporate any leftover moisture. According to the USDA food safety guidelines, dry heat is one of the best ways to prevent water-induced oxidation — even after towel drying.
Real-World Example of Hidden Risks
In practice: picture this scenario — you host a family dinner, rinse your skillet late at night, and put it away slightly damp. By the next weekend, there’s that orange film across the cooking surface, and the once-slick finish feels sticky. What started as a five-minute shortcut ends up costing you a full afternoon of scrubbing and reseasoning. Not fun.
| Mistake | Short-Term Result | Long-Term Impact |
|---|---|---|
| Damp Storage | Spotty rust, dullness | Deep pitting, ruined seasoning |
| No Re-Oiling | Sticky, flaky surface | Loss of nonstick protection |
| Stacking Without Padding | Scratches, chips | Cracked or misshaped pan |
And this is exactly where most people make the most common mistake…
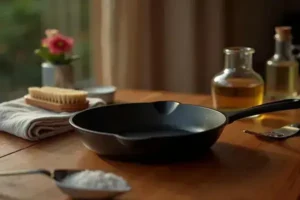
Best Drying And Seasoning Techniques Before Storage
Got your cast iron washed and ready, but you’re worried about rust or a sticky finish? That’s the perfect time to pause and look at your drying and seasoning routine — because even tiny missteps here make a huge difference.
- Towel Dry Immediately: Don’t let your pans air dry. Use a lint-free kitchen towel right after rinsing. Even a few minutes of standing water triggers rapid oxidation.
- Use Heat to Evaporate Moisture: Set your skillet on a warm stove burner (medium-low for 2-3 minutes). This makes absolutely sure that all hidden moisture is gone — a recommendation you’ll find in countless USDA food safety manuals.
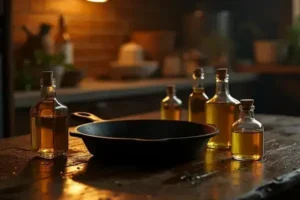
- Apply a Thin Layer of Oil: When the pan’s still warm (never piping hot), add 1/2 teaspoon of a neutral oil like grapeseed, flaxseed, or canola. These have high smoke points and form a better polymerized coating.
- Wipe Off Excess Oil: This is key — extra oil gets gummy and sticky in storage. Wipe with a clean paper towel or cloth until it looks nearly dry.
- Heat Again for Seasoning: Place the pan upside down in a 400°F oven for 45-60 minutes. Let it cool inside the oven, so the seasoning hardens evenly and bonds without streaks.
- Needed Items:
- Soft towel or cloth
- Neutral cooking oil (grapeseed, flaxseed, or canola)
- Paper towels
- Stove and oven access
💡 Pro Tip: If you’re in a hurry, a quick 5-minute heat cycle on your stove after oiling forms a solid barrier — recommended by the American Culinary Federation for busy kitchens.
In practice: after a weeknight stir fry, you clean your skillet, dry it by hand, then briefly heat it. You add a thin coat of grapeseed oil, wipe it nearly dry, and heat it again in the oven while the rest of dinner finishes. Next time, your eggs slide out and the pan looks brand new. That’s real-world convenience and lasting results.
What actually works might surprise you…
Creative Storage Solutions For Any Kitchen Size
Is your kitchen feeling too small for proper cast iron storage? You’re not alone. Strong, heavy skillets and Dutch ovens seem to multiply, and suddenly cabinet space feels like prime Manhattan real estate. But you don’t need a giant kitchen — just smart strategies tailored for what you have.
- Wall-Mounted Racks: These pegboard kits or custom rails instantly turn an empty wall into organized, visible storage. The National Kitchen & Bath Association notes that open storage also helps airflow, which is key for rust prevention.
- Hanging Pot Racks: If you have even a small patch above your island or sink, a hanging rack keeps pans handy and safe from chipping or crowding. Use S-hooks to space each skillet or Dutch oven at least two inches apart.
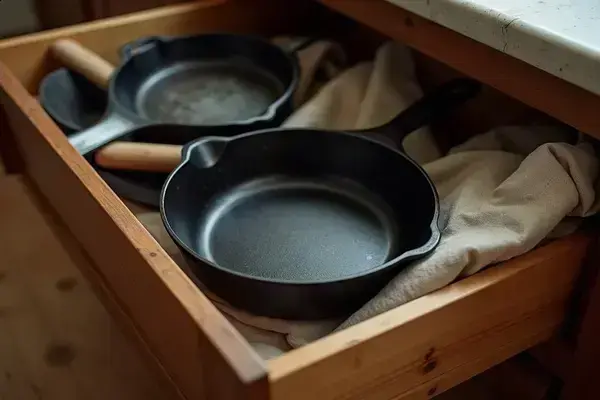
- Drawer Inserts: Custom bamboo or cedar inserts let you nest pans (with felt or linen between) in deep drawers while protecting both cast iron and cabinetry from scratches. Cedar’s natural oils even deter moisture.
- Shelf Risers and Dividers: These freestanding shelf expanders double your vertical space, so you can stack pans securely while maintaining needed airflow. Place a folded cotton towel between items for extra care.
- Miniature Shelving Units: Those slim bathroom shelves? They’re perfect for narrow spots beside the oven or fridge. Even an eight-inch wide sliver becomes valuable real estate for a set of carbon steel skillets.
💡 Pro Tip: Store lids separately, standing upright in a rack, to prevent trapped humidity and chipped enamel — a trick recommended by America’s Test Kitchen for both home and professional setups.
Picture this scenario: You add a vertical pegboard to a blank kitchen wall, hang each cast iron piece on sturdy, padded hooks, and see your skillet collection become a functional (and stylish) display that actually encourages you to use them more often. No more digging, no more scratching paint or enamel — and everything stays bone-dry, even in a humid summer.
| Solution | Best For | Limitations |
|---|---|---|
| Wall Rack | Apartment kitchens | Needs strong wall anchors |
| Hanging Pot Rack | Open ceilings, above islands | Ceiling clearance required |
| Drawer Inserts | Deep drawers, modern remodels | Custom fit may be needed |
And this is exactly where most people make the most common mistake…
How To Revive And Maintain Older Cast Iron Pans
Ever inherited an old cast iron pan that looks more haunted than helpful? Don’t toss it out—bring it back to life. The restoration process isn’t complicated, but it does require a bit of patience and technique. Even the National Park Service, which maintains historic cookware in its heritage kitchens, recommends intentional revival steps to transform vintage pieces into daily workhorses.
- Remove Rust Completely: Scrub deeply with steel wool or a chain mail scrubber. For heavy rust, soak the pan briefly in a solution of equal parts white vinegar and water—never more than one hour, or pitting can occur.
- Wash Thoroughly: Clean with hot water and a mild detergent. This is one of the rare times soap is your friend; it eliminates old rancid oils and hidden debris.
- Dry with Heat: Place the pan on a low burner until all moisture evaporates. This prevents flash rust and preps the surface for seasoning.
- Reseason Generously: Coat with a thin, even layer of high-smoke-point oil (flaxseed, grapeseed, or canola are excellent). Bake upside down at 425°F for one hour; let cool inside the oven—repeat two or three times for the strongest finish.
- Regular Upkeep: Once revived, use your pan! After each wash, dry and oil as you would a new piece. Frequent use deepens the seasoning and keeps rust at bay.
- Required Items:
- Steel wool or chain mail scrubber
- White vinegar and water
- Mild dish soap
- High-smoke-point oil
- Paper towels
⚠️ Important Warning: If your pan has deep cracks or holes, structural damage can’t be reversed—contact a restoration specialist before use. For food safety, check with local extension offices or the USDA about reusing antique cookware.
In practice: your grandmother’s skillet sits in the basement, caked with rust but solid beneath. After a weekend of scrubbing, soaking, and patient reseasoning, you fry eggs on it for the first time. They glide across the surface, and family history continues with every meal. The right habits in place now make everything easier from here.
Your Cast Iron’s Best Days Ahead
It’s easy to stress about rust, crowded cabinets, or losing years of seasoning. But if you take just one thing from this cast iron storage guide at home, let it be: how you store your pans at home shapes everything—longevity, flavor, and peace of mind are all on the line.
Before, you might have worried every time you stacked, washed, or put your skillet away. Now you know exactly what works: smart drying, creative space solutions, and real maintenance habits. Little changes add up fast. Your cookware gets safer, easier, and future-ready—starting today.
Which storage idea or care tip are you going to try first with your cast iron? Share your plans or any clever tricks in the comments below!

Blake Aaron Mercer is a cast iron cookware enthusiast and home cook dedicated to helping everyday people get the most out of their skillets, Dutch ovens, and griddles. With years of hands-on experience seasoning, restoring, and cooking with cast iron, Blake built Hnnew to be the honest, practical cast iron resource he always wished existed when he was starting out.