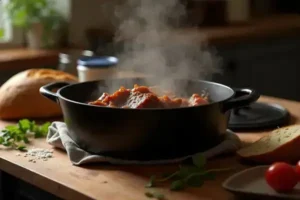
Picture this: you place your prized cast iron skillet on a fancy new induction stove, expecting that signature sear—then all you get is uneven heat and a stubborn ring of disappointment. Nothing spoils the mood faster than realizing the pan you love feels out of place on your cooktop.
The frustration is real. Cast iron’s legendary power can backfire on induction, leaving food with burnt patches or cold spots, and making you wonder if these two are even supposed to work together. Toss in the worry about damaging your skillet or the cooktop itself, and who wouldn’t feel a little lost?
By the last word here, you’ll know the smart, practical cast iron induction guide tips to master any cooktop—no confusion, no trial-and-error. Ready to get the best out of that skillet? Here’s where it all starts.
Why Cast Iron Works Differently On Induction Cooktops
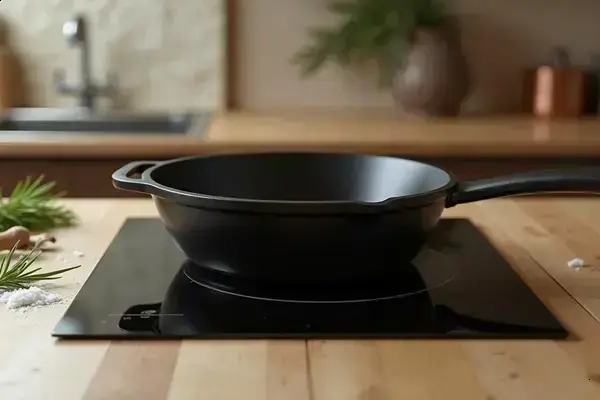
So, why does cast iron act like a completely different animal when you use it on induction cooktops? It’s not just a quirk—there’s serious science at play. Induction cooking doesn’t use traditional heat. Instead, it relies on rapidly oscillating magnetic fields to excite the metal in your pan. That means only pans that respond to magnets—like cast iron—will even work at all.
This all sounds great, but here’s the catch you might not expect: cast iron is famously dense and uneven. The magnetic energy from an induction burner gets absorbed right at the contact point, but that thick, heavy metal resists distributing heat as evenly as say, stainless steel clad pans.
💡 Pro Tip: If you ever notice a sizzling ring forming only around the edge of a fried egg—while the center stays undercooked—that’s your cast iron and induction combo revealing the limits of magnetic heating. According to the Cookware Manufacturers Association, bringing pans up to temperature slowly minimizes these uneven hot spots and protects your investment.
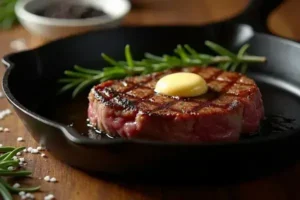
Picture this scenario: you’re eager to sear a steak, so you crank the induction burner to full power with your favorite cast iron pan. Almost instantly, the area above the magnetic coil gets scorching, while an inch away is barely warming. You have to swirl, shift, even preheat longer than you would on gas or electric, or you’ll end up with a great crust in some spots and gray meat in others. Isn’t that frustrating?
| Cooktop Type | Heat Source | Cast Iron Performance |
|---|---|---|
| Induction | Electromagnetic field | Instant response; can produce rings of heat, needs care |
| Electric Coil | Direct contact heat | Slower to heat, but warms pan side-to-side |
| Gas Flame | Open flame | Heats up sides and bottom; forgiving but slower to respond |
The American Test Kitchen recommends always letting cast iron heat gradually on induction—to avoid thermal shock and warping. Remember, your pan could last generations if you use it with a little patience.
What actually works might surprise you…
Choosing The Right Skillet For Induction Success
Ever picked up a new cast iron pan with excitement, only to watch it struggle on your induction cooktop? The truth is, not all skillets are created equal—especially where magnetics and heat conduction are concerned. That’s why choosing the right skillet can make or break your cooking results on induction.
Let’s get specific. When shopping for a cast iron, weight and flatness matter much more than you might think. A heavy pan offers more thermal mass, allowing for stable heat retention, but only if the base is truly flat. Even a slight warp or wobble causes energy loss and uneven cooking. According to the Cookware Manufacturers Association, professional-grade cast iron from brands like Lodge, Staub, and Le Creuset is engineered with smooth, induction-ready bases. But cheaper or vintage options sometimes have a rough cast or raised logos underneath—these reduce full surface contact and efficiency.
💡 Pro Tip: Before buying or using your skillet, test magnetism by sticking a strong fridge magnet to the base. If it grabs firmly, you’re good for induction. A weak pull or slipping magnet means the skillet may not deliver consistent results.
- Preseasoned finish: Saves you time, lets you cook right away, and builds up nonstick quality with every use.
- Enamel coating: Prevents rust and allows for gentler cleanup but costs more. Make sure the enamel covers the whole base for best induction performance.
- Pour spouts: Nice for sauces, but check that they’re not excessive—spouts mean less flat contact area with your cooktop.
In practice: picture this scenario—you bring home a gorgeous vintage skillet from the flea market. At first, it refuses to heat evenly or even triggers your induction cooktop’s error message. You flip it over, realize the base curves ever so slightly, and now you know why. High-quality pans make all the difference in modern kitchens.
| Brand | Special Feature | Best For |
|---|---|---|
| Lodge | Thick, preseasoned, value pricing | Everyday cooking, beginners |
| Le Creuset | Fully-enameled, flat base, premium build | Gourmet meals, easy cleaning |
| Staub | Enamel with textured interior, robust handles | Slow roasts, high-heat searing |
Most professional chefs surveyed by America’s Test Kitchen favor flat-bottomed, well-seasoned cast iron for reliability on induction—no matter what’s on the menu. But there’s one detail most owners completely overlook until it’s too late…
How To Prep And Season Your Cast Iron For Induction
Ever wondered why some cast iron skillets just won’t heat evenly, even if they look clean and sturdy? The difference almost always comes down to prep and seasoning. Getting this right makes your pan a powerhouse on induction.
- What you’ll need: cast iron skillet, mild dish soap, non-abrasive brush, clean towel, high-smoke-point oil (grapeseed, canola, or flaxseed), paper towels, induction-safe trivet (optional), oven or induction burner.
- Initial Cleaning: Wash the skillet with a few drops of dish soap and a brush—yes, soap is fine for new pans. Thoroughly dry it, as moisture can cause rust.
- Check For Rough Spots: Run your hand along the bottom and edge. A rough or gritty surface means uneven heat on induction. If necessary, use a scrub pad to smooth lightly.
- Oil The Surface: Rub a light, even coat of high-smoke-point oil over the interior and the base. Don’t overdo it—thin layers bond better and won’t turn sticky.
- Heat To Polymerize: Place the skillet upside down in an oven at 450°F (232°C) for one hour, or on your induction burner at medium for 10–15 minutes until the oil darkens and gets semi-glossy.
- Cool and Repeat: Let it cool, then repeat steps 3–4 at least twice more. For best results, season three times before first official use.
⚠️ Important Warning: Never apply thick layers of oil—this causes sticky, uneven patches instead of the smooth nonstick finish you want. The Lodge Cast Iron company and Serious Eats both recommend multiple thin coats for truly resilient seasoning that stands up to high-heat induction use.
In practice: your friend grabs an old pan from the back of the cabinet, scrubs it quickly, pours on oil, blasts the induction to full power, then wonders why the bottom stays sticky and patchy. If you slow down and season right, the pan transforms from a frustrating relic to your kitchen’s MVP.
What actually works might surprise you…
Step-By-Step: Cooking Techniques That Avoid Hot Spots
Ever pulled a delicate pancake off your cast iron—only to find the center pale and the edges burnt? Hot spots are the perpetual enemy on induction when using cast iron. But the right approach means flawless searing, frying, and baking every time.
- Cast iron skillet (flat-bottom)
- Induction cooktop
- High-temp spatula
- Oven mitt
- Neutral oil
- Heat-safe thermometer (optional)
- Preheat Low and Slow: Start your empty skillet on the lowest induction setting for 2–3 minutes. The goal: let the entire iron body warm gently so the heat spreads before you crank it up.
- Add a Light Oil Coating: Using a paper towel, wipe the bottom and sides of the skillet with a thin film of oil—not pools, just sheen. This improves thermal contact and prevents sticking.
- Increase the Power Gradually: Move to a medium setting. Wait another 2–4 minutes. Resist the urge to go straight to high; slow steps let the thick iron catch up evenly.
- Test With a Drop of Water: Flick some water on the surface. A sizzle and quick bead means you’re ready to cook; a slow fizz means more time is needed.
- Shift and Rotate: While cooking, occasionally rotate the pan by a quarter turn and make small movements over the induction zone. This manual adjustment equalizes any lingering hot spots.
- Finish in Oven (Optional): For thick proteins or baked items, move your skillet to a preheated oven to finish. This ensures all sides set evenly and avoids surface overcooking.
💡 Pro Tip: America’s Test Kitchen notes most induction cooktops send power in cycles—not a continuous blast—so letting your skillet rest 15–30 seconds between batches gives heat a chance to rebound, evening out the surface again.
In practice: you’re making crispy hash browns, but only one side browns up fast. Spin the skillet every minute, and they come out perfectly crisp all across. Makes a huge difference, right?
And this is exactly where most people make the most common mistake…
Troubleshooting Common Issues With Cast Iron On Induction
Ever felt like your cast iron just refuses to cooperate on your induction cooktop—despite all your prep? You’re not alone. Even seasoned home cooks get stumped by weird errors, sticky messes, and uneven heating that just doesn’t show up on gas or electric ranges.
- Pan Won’t Heat or Triggers “E” Error: Most induction errors come from a warped or non-magnetic base. Test your skillet with a strong magnet. If it won’t stick or wobbles on a flat surface, your induction burner may cut out to avoid damage.
- Uneven or Patchy Cooking: Hot rings or cold centers almost always mean the pan isn’t sitting perfectly flat, or you’re using too high a power setting too fast. Gradual preheating can solve 90% of these issues.
- Sticky or Flaking Seasoning: If food clings or the oily surface flakes, it may be due to thickly applied oil or overheating during seasoning. Stripping and reseasoning with multiple thin coats—ideally in the oven—restores that resilient nonstick layer.
| Problem | Likely Cause | Solution |
|---|---|---|
| Cooktop Error Code | Pan not flat or not magnetic | Check magnet, replace warped pans |
| Heat Rings/Cold Spots | Fast power ramp on dense iron | Preheat gradually, rotate pan |
| Sticky Surface | Too much oil or seasoning | Strip and reseason thinly |
⚠️ Important Warning: If your pan ever makes a loud popping or sudden “clack” sound on induction, stop heating right away. According to Consumer Reports, thermal shock can crack cast iron or even crack glass cooktops—never force rapid heat changes.
In practice: picture this scenario—your skillet suddenly starts slipping around with the slightest touch and triggers the “E0” code. Turns out, you swapped pans and the new one isn’t induction-ready at all. Avoid that by always running the magnet test before use.
The right habits in place now make everything easier from here.
Your Skillet Skills Unlocked
If you take just one thing from this cast iron induction guide, let it be: slow, steady heat and a well-prepped pan are the secret sauce. Choose a flat, magnetic skillet, season it right, and always bring up the temperature gradually—these steps solve the toughest cooktop problems.
Maybe induction and cast iron felt incompatible before. Now you know how to tackle sticky seasoning and cold spots with confidence. Simple adjustments give you more control, every single time. You’re not just guessing anymore—you’re cooking smarter.
What’s your biggest cast iron frustration on induction stoves—or your proudest win so far? Share your story in the comments below. Let’s keep learning together!

Blake Aaron Mercer is a cast iron cookware enthusiast and home cook dedicated to helping everyday people get the most out of their skillets, Dutch ovens, and griddles. With years of hands-on experience seasoning, restoring, and cooking with cast iron, Blake built Hnnew to be the honest, practical cast iron resource he always wished existed when he was starting out.