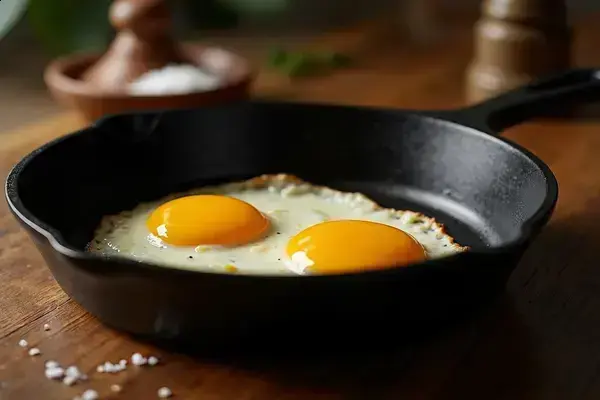
Picture this: you’ve just cracked a couple of eggs into your cast iron pan, hopeful for that silky-smooth glide. But instead? You’re scraping stubborn bits with a spatula, wishing breakfast had gone a whole lot easier.
That frustration—sticky eggs, torn yolks, a pan that looks like it picked a fight—isn’t just annoying, it’s enough to make you avoid cast iron altogether. Who wants to spend the morning scrubbing instead of eating?
But stick with me. By the end of this guide, you’ll know exactly how to master cooking eggs cast iron guide tips for reliably delicious, stress-free eggs—no scraping required. Ready to see what actually works? Let’s dive in.
Why Eggs Stick To Cast Iron (And How To Prevent It)
Ever wonder why your eggs stick to cast iron, even when you swear you’ve seasoned that skillet more times than you can count? Here’s the thing: it’s not just you — eggs are protein-bombs and cast iron has quirks that frustrate even pro chefs.
The main villains? Temperature swings, underseasoned pans, and oiling mistakes. When the metal isn’t hot enough or the seasoning layer (that thin baked-on oil film) is patchy, eggs latch onto every microscopic bump. Add too little fat or pour eggs before the oil shimmers, and you get a breakfast battle instead of a flip.
💡 Pro Tip: Always preheat the pan for at least 5 minutes on medium-low, then add a teaspoon of oil and heat until it looks glossy — but don’t let it smoke. America’s Test Kitchen recommends this method because protein chains in eggs coagulate less aggressively on an evenly heated surface, making sticking less likely.
Is seasoning really that important? According to Lodge Manufacturing—the oldest cast iron brand in the US—it’s non-negotiable. Seasoning fills in the pan’s natural pores, creating a slick base. One quick test: gently wipe the cooled surface with a paper towel. If it snags, you’re due for a reseason.
| Cause | Result | Prevention |
|---|---|---|
| Pan too cold | Eggs bond to metal | Preheat & check oil shimmer |
| Thin/old seasoning | Rough surface, food sticks | Reseason pan regularly |
| Not enough fat | Eggs dry and cling | Use enough oil or butter, every time |
Picture this scenario: you crack two eggs into a cold cast iron pan for a “quick” breakfast. Nothing seems to happen, so you crank the heat. By the time the eggs white up, they’re already glued tight, and scraping only makes it worse. Frustrating, right?
The National Restaurant Association backs up these tips, noting that patience—especially with heat—is the single most overlooked success factor for nonstick eggs, even in busy kitchens. And honestly? Following these basics means fewer ruined breakfasts and a lot less elbow grease later.
But there’s one detail most home cooks completely overlook until they’re faced with disaster in the morning rush…
Choosing The Best Cast Iron Pan For Cooking Eggs
How much does your choice of pan really matter when it comes to effortless, nonstick eggs? Quite a bit, actually — and the difference shows up on your plate and in your clean-up time.
The truth is, cast iron pans aren’t all created equal. Differences in smoothness, weight, and even brand seasoning can mean the difference between a golden, gliding egg and one welded to the surface. Let’s take a closer look at some proven options and what makes each unique.
| Brand/Model | Surface Quality | Egg Cooking Experience |
|---|---|---|
| Lodge Classic Skillet | Preseasoned, slightly textured | Great for hearty eggs, minor sticking if rushed |
| Smithey No. 8 Skillet | Satin-smooth finish | Eggs glide, easy flip, premium price |
| Field Company No. 8 | Hand-polished, lighter weight | Terrific for gentle eggs, less wrist strain |
Picture this scenario: you’re staring at two pans in your cupboard. The heavy, rougher Lodge and the lighter, glassier Field Company. For scrambled eggs and quick over-easy mornings, that smoother interior makes a visible difference — not just in texture, but in confidence.
- Weight: Lighter pans are easier on your wrists and feel nimbler when tilting eggs out, but denser ones retain heat better.
- Factory Seasoning: Some brands arrive ready-to-use, others need a bit of extra seasoning at home. Always check!
- Pan Slope: Gently sloped sides let you slide a spatula under eggs without shattering the yolk.
💡 Pro Tip: The smoothest pans may cost more, but a satin-finish like Smithey’s can reduce sticking so dramatically you’ll need less cooking oil—saving you money in the long run. Consumer Reports has repeatedly found surface texture to be a leading cause of egg sticking in kitchen tests.
Many serious home cooks find that investing in a well-crafted, smooth-surfaced pan pays off over years of fuss-free breakfasts. For others, re-seasoning an affordable classic like Lodge brings nearly the same satisfaction — at a third the price. For health or safety concerns about surface treatments or pan material, refer to official guidelines from the U.S. Food & Drug Administration.
And this is exactly where most people make the most common mistake…
How To Properly Preheat And Oil Your Pan
Wondering why preheating and oiling your cast iron never feel as simple as the YouTube chefs make it look? The answer is in the little details—and skipping a step often means dealing with stuck-on egg disasters or uneven browning.
Properly preparing your pan starts with gathering the right components:
- Clean, fully dried cast iron skillet
- High-heat friendly oil (canola, avocado, or grapeseed)
- Stovetop burner (gas or induction)
- Paper towels or a heat-resistant brush
- Eggs, and a spatula for cooking
- Place your skillet on the burner and heat it gradually over medium-low for 4–5 minutes. Don’t rush—patience here prevents warping and hot spots.
- Test the heat. Flick in a few water drops: they should dance and evaporate, not just sit or vanish instantly.
- Add 1–2 teaspoons of oil, tilting the pan to coat the entire surface, especially around the edges.
- Wait until the oil is shimmering—but not smoking—before adding anything else. The shimmering look signals the fat is ready to form a nonstick layer.
- Wipe away excess oil with a paper towel if there’s any pooling. This avoids soggy spots under your eggs and helps protect your seasoning.
⚠️ Important Warning: Never walk away during preheating. Overheating destroys seasoning—and makes even the best oil turn rancid or start smoking, which the Environmental Protection Agency warns can emit toxins. Stay close and lower the heat if you notice smoke.
In practice: picture this scenario—you’re prepping eggs before work, feeling rushed. You crank up the skillet, toss in some oil, and dump your eggs straight in. The result? Burnt oil, half-cooked whites, and a stubbornly gluey mess.
The Lodge Manufacturing official guide insists on patient, even heating and the right oil quantity to mimic true nonstick performance in cast iron. Science backs this up: oil molecules need a few minutes at the correct temperature to bind, filling in the invisible pores and creating that coveted easy-release surface.
What actually works might surprise you…
Step-By-Step Guide To Cooking Eggs Without Sticking
Think you’re doing everything right, yet your eggs still stick in cast iron? Sometimes a clear, stepwise approach is all you need. Success comes from layering technique with patience and consistency—so let’s break it down.
- Cast iron skillet (clean, seasoned, and dry)
- Your preferred oil (canola, avocado, or clarified butter for best results)
- Eggs (fresh make a difference for nonstick success)
- Flexible silicone or thin metal spatula
- Paper towel for excess oil
- Warm Up Gradually: Place your pan on medium-low for 3–5 minutes—never rush this step! Even heating is the key to releasing proteins.
- Add the Right Oil: Pour in 1–2 teaspoons, swirl to coat the whole surface (including edges), and heat until it shimmers but doesn’t smoke.
- Test With a Drop: Flick in a tiny bit of egg white. If it cooks gently and slides, you’re ready. If it sizzles violently or congeals instantly, wait and adjust heat.
- Crack and Cook: Add eggs gently. Let them set on the still, undisturbed surface for 60–90 seconds before touching or tilting.
- Ease and Flip: Slide the spatula edge slowly under the egg—work from edge to center. Flip or serve when the underside releases easily.
- Quick Release Trick: If edges resist, add a few drops of oil and swirl the pan. The new fat sneaks under, loosening stuck spots.
- Remove and Plate: Move finished eggs onto a plate immediately, so residual heat doesn’t create sticking right at the end.
💡 Pro Tip: According to the Culinary Institute of America, patience with preheat and resisting the urge to stir too soon are the top secrets to a nonstick egg in cast iron. Don’t hover—let the pan do the work.
In practice: picture this scenario—a Sunday morning, you take your time, follow every step, and are rewarded with eggs that slide out in one perfect motion. There’s no scraping, just breakfast bliss with minimal cleanup.
But there’s one detail most owners completely overlook until it’s too late…
Troubleshooting: What To Do When Eggs Still Stick
Ever follow every rule and still have eggs stubbornly glue themselves to your cast iron? It happens—even to skilled cooks. Troubleshooting gets you back on track, saving both your pan’s seasoning and your breakfast mood.
Let’s break down possible trouble spots and what you can do about them. Sometimes it’s a single misstep—a pan too cold, oil spread too thin, or a spatula angle that’s just off. The solution depends on what you see and feel in the moment.
| Problem | What You Notice | Fix |
|---|---|---|
| Eggs stuck to pan | Edges resist spatula | Add oil, cover briefly, try gentle lift |
| Eggs break or tear | Yolk splatters, whites stick | Lower the heat, let pan cool a moment |
| Oily but still sticking | Eggs slide poorly, odd rough patches | Pan may need reseasoning—clean, dry, bake with oil ASAP |
💡 Pro Tip: According to experts at Cook’s Illustrated, if eggs stick despite everything, pour in a splash of water, cover with a lid for 10 seconds—the steam helps loosen stubborn proteins so eggs release cleanly.
In practice: picture this scenario—your second egg clings to the pan after the first came out perfect. You try to pry it up, but the surface just grabs tighter. Frustrating! Rescue it by sliding in a thin spatula with a drop of oil, then use steam if needed.
- Prevent further damage: Avoid scraping too hard—sometimes all it takes is a touch more patience or a creative trick (like steam) to save the morning.
- Assess your seasoning: Patchy, dull spots mean your pan wants a refresh—wipe clean and reseason right after cooking.
- Spatula matters: Thin, flexible spatulas (especially silicone or fine-edge metal) are easiest for delicate eggs.
The National Restaurant Association advises home cooks to embrace a ”fix and learn” mindset. Every pan is a bit different—small tweaks make all the difference. Once this is in place, the rest of the routine falls into place naturally.
Eggs Finally Slide, Not Stick
If you take just one thing from this guide, let it be: a great result with cooking eggs in cast iron comes down to preheating, proper oiling, and a smooth pan. Keep those three things in mind and you’ll solve most egg-sticking problems.
Before, making eggs in cast iron felt like a gamble—some mornings you won; others, you lost your patience and your breakfast. Now you know how to pick the right pan, prep it right, and fix whatever goes wrong. You’re in control, and that’s a real shift.
What’s the one trick or tip from this guide you’re excited to try next time you cook eggs? Let us know in the comments—your story could help someone else’s morning get just a little easier!

Blake Aaron Mercer is a cast iron cookware enthusiast and home cook dedicated to helping everyday people get the most out of their skillets, Dutch ovens, and griddles. With years of hands-on experience seasoning, restoring, and cooking with cast iron, Blake built Hnnew to be the honest, practical cast iron resource he always wished existed when he was starting out.