
Ever pulled out your cast iron, ready to cook, only to find food sticks like glue and cleaning turns into a mini workout? It’s frustrating—like your skillet’s working against you instead of for you.
Skipping or rushing the seasoning process isn’t just inconvenient, it can ruin your meal and wreak havoc on a pan you invested time and money in. Rust creeps in fast, your food never gets that perfect sear, and suddenly you’re second-guessing every cleaning move. You shouldn’t have to fight your cookware.
By following a proven cast iron seasoning checklist, you’ll master the simple rituals that keep your pan easy to clean, reliably non-stick, and rust-free. Ready to finally make your cast iron work as hard as you do? Here’s where it all begins.
Why Seasoning Matters For Cast Iron Cookware
If you’ve ever wondered why chefs swear by cast iron, it’s not just nostalgia or brand loyalty—it’s all about the seasoned surface. A properly seasoned pan transforms even basic cookware into a kitchen powerhouse, building a natural non-stick layer that’s tough enough for daily scrambling, searing, and baking. But what exactly is seasoning, and why does it matter so much?
Here’s the thing: seasoning isn’t just a quick coating; it’s actually a hard, protective film created over time. When you heat oils or fats in your pan, they undergo a chemical process called polymerization—turning liquid oils into a solid, slick barrier that repels rust and sticks less with every use. Skip this process, and you’ll find yourself battling stubborn food residue, rust patches, and a cycle of frustrating cleanups that make you want to retire your skillet for good.
💡 Pro Tip: The Lodge Cast Iron company, a leading authority for over 120 years, recommends using thin layers of vegetable oil and baking it at a high temperature for optimal polymerization. The result? A dining experience with less scraping—and more flavor retention.
In Practice: The Real Impact of Proper Seasoning
Picture this scenario: You’re making cornbread for the first time in your new cast iron skillet. If that pan isn’t seasoned right, you can kiss that beautiful golden crust goodbye—half of it will stick behind. But layer by layer, as you season and use your pan, you’ll notice a dramatic shift. Food slides out, cleanup is faster, and you need less added oil for frying chicken or flipping pancakes. It’s a visible, practical improvement, not just theory.
| Benefit | With Seasoning | Without Seasoning |
|---|---|---|
| Non-stick Performance | High—eggs and fish release easily | Low—persistent sticking, scraping required |
| Rust Resistance | Excellent—protective layer blocks moisture | Poor—bare metal rusts quickly |
| Flavor Development | Improves with each cook | Flavor loss, metallic aftertaste possible |
The truth is, the biggest difference between a satisfying meal and a kitchen mess comes down to that invisible barrier. Seasoning isn’t just a bonus—it’s essential for function, flavor, and long-term durability.
But there’s one detail most owners completely overlook until it’s too late…
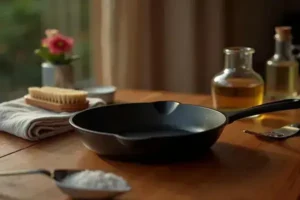
Essential Tools And Ingredients For Proper Seasoning
Ever stood in your kitchen and wondered if you truly have everything needed for proper cast iron seasoning—or are you missing something that could make or break your results? Building that flawless, natural non-stick finish starts long before you even turn on the oven. Preparation is where most home cooks either set themselves up for years of easy meals or fall into a cycle of frustration.
Let’s break it down. You’ll need a small but mighty toolkit. Here it is—nothing fancy, but every item matters:
- Cast iron pan or skillet (clean and fully dry)
- High-quality paper towels or lint-free cloth
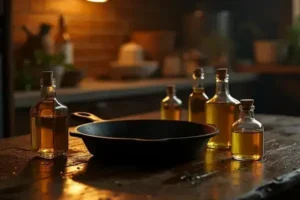
- Neutral cooking oil (like flaxseed, grapeseed, or canola)
- Stiff-bristled brush or chainmail scrubber
- Aluminum foil (for oven racks)
- Protective oven mitts
💡 Pro Tip: According to America’s Test Kitchen, flaxseed oil creates one of the hardest, most resilient seasonings—but it can be finicky and more expensive. Stick to grapeseed or vegetable oil for everyday reliability if you’re just starting out.
Picture this scenario:
You’re eager to finally season that new skillet. You grab regular olive oil—because it’s what’s in the pantry. The result? Sticky residue that never quite bakes on, and a surface that feels tacky no matter how long you heat it. One swap for the right oil changes the whole game, giving you crisp potatoes and a pan that cleans up in seconds. That’s not just convenience—it’s confidence.
| Tool/Ingredient | Best Use | Substitutes |
|---|---|---|
| Grapeseed Oil | Hard, smooth seasoning layers | Canola, vegetable oil |
| Paper Towels | Even layer, easy wipe-off | Linen cloth, clean cotton rag |
| Chainmail Scrubber | Remove stuck bits, prep surface | Stiff nylon brush |
Don’t overlook the basics—great seasoning starts with thoughtful choices. What actually works might surprise you…
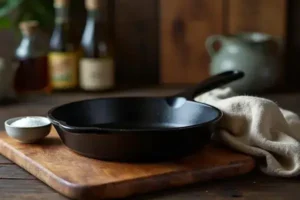
Step-By-Step Instructions For Building A Flawless Non-Stick Surface
How do you actually get that perfect, glossy cast iron finish? If you’ve ever read all the hot tips and still ended up with a sticky, uneven pan, you’re not alone. Achieving a true non-stick surface requires a little patience and the right process—not just slapping on some oil and hoping for the best.
- Scrub and dry your pan thoroughly. Start with super hot water (no soap if possible) and a stiff brush or chainmail scrubber to remove gunk. Dry it on the stovetop until it’s bone-dry—water left on the surface leads to instant rust.
- Add a thin, even coat of oil. Use a small amount of neutral oil, like grapeseed or canola. Rub it in with a paper towel, covering every nook and cranny, including the handle and edges.
- Buff off the excess oil. Here’s where most people go wrong: wipe off almost all of it until there’s only the tiniest sheen. Too much oil causes sticky patches and flakes.
- Bake the pan upside down. Place a sheet of aluminum foil on the lower oven rack to catch drips, and the pan on the rack above, upside down. Bake at 450°F (232°C) for 60 minutes. Allow it to cool in the oven.
- Repeat for 3 layers. Apply fresh oil, buff, and bake again—at least three times for a hard, glassy surface that lasts. More layers mean tougher seasoning and less sticking, especially for eggs or fish.
⚠️ Important Warning: Never use commercial aerosol sprays or butter for seasoning—these leave a gummy residue that can actually break down your hard-earned surface. The Cast Iron Collectors Association agrees: stick with pure oils for best results.
In practice:
You seasoned your pan once and got frustrated when pancakes stuck. But after repeating three thin layers—taking time in between—your pancakes will flip like on a premium non-stick skillet. Friends get crisp hash browns, you get compliments, and clean-up gets easier after every use.
- Estimated time: 2.5–3 hours (with cooling)
- Level: Beginner-friendly, just a little patience needed
And this is exactly where most people make the most common mistake…
How To Maintain That Non-Stick Perfection Over Time
So you’ve built a flawless non-stick surface—now the real test is keeping it that way, meal after meal. The truth is, maintenance isn’t complicated, but consistency is everything. If you treat your pan right, that seasoning grows richer, slicker, and more resilient year after year.
- Clean promptly after use. Skip overnight soaking! Let your skillet cool slightly, then clean while it’s still warm with hot water and a stiff brush. Stubborn bits? Use coarse kosher salt as a gentle abrasive.
- Dry completely—zero exceptions. Any water left behind is an open invite for rust, which destroys seasoning surprisingly fast. Place your pan on low heat for a few minutes to drive off leftover moisture.
- Apply a micro-layer of oil after each wash. Rub in 3-5 drops of neutral oil (grapeseed is great). Buff with a paper towel until the surface is barely shiny—never sticky.
- Store properly. Keep your skillet in a dry spot with plenty of airflow. If stacking, place a folded towel or paper between pans to avoid scratches.
💡 Pro Tip: America’s Test Kitchen recommends performing a quick seasoning touch-up every month: light oil, then bake at 400°F (204°C) for one hour. This preventative step will keep your non-stick layer nearly bulletproof for years.
In practice:
You fry bacon for weekend brunch, wipe out the fat, and notice a few sticky patches forming. Skipping oil for just a week? Those spots start attracting stuck-on food and dull the finish. But with quick rubdowns and regular heating, your skillet looks and performs like premium nonstick—without added chemicals or coatings.
| Mistake | Result | How to Fix |
|---|---|---|
| Leaving water in skillet | Rust spots, patchy seasoning | Scrub, dry, re-season immediately |
| Skipping oil rubdowns | Surface dulls, food starts to stick | Do multiple light oilings and bake once monthly |
| Soaking overnight | Seasoning flakes, skillet smells metallic | Dry thoroughly, reseason 1–2 times |
But there’s one last hurdle—handling problems when they pop up unexpectedly…
Troubleshooting Common Cast Iron Seasoning Problems
Ever pulled out your cast iron and found sticky spots, rusty edges, or odd flakes coming off—even though you followed all the rules? That’s the reality for even careful cooks. But the good news? Every common problem is fixable, fast, when you know what’s actually going on.
Here’s a breakdown of the problems you’re most likely to see and what each one means:
| Issue | Symptom | Fix |
|---|---|---|
| Sticky Residue | Surface feels tacky or gummy | Scrub, reheat to 450°F, wipe excess oil |
| Rust Spots | Orange or brown patches, rough texture | Scour, dry, reseason with neutral oil |
| Flaking Coating | Black chips or flakes appear | Strip old seasoning, redo three thin layers |
| Splotchy Finish | Pale, uneven appearance | Repeat oiling/baking, buff between layers |
⚠️ Important Warning: Never panic and throw out your skillet—seasoning flaws are almost always temporary setbacks. The Lodge Manufacturing Company, an industry leader, confirms that even rusty pans can be restored with the right steps.
In practice:
You notice your eggs start sticking, or a rusty ring forms after just one wash. It’s annoying—absolutely. But grab a stiff brush, a handful of coarse salt, and commit to a seasoning reset: strip, dry, oil, repeat. You’ll watch your cast iron return to its prime within an afternoon, feeling as smooth and non-stick as any new pan on the market.
- Sticky after seasoning? Use less oil, and really buff it in next time.
- Rusty or flaky? Scrub it all the way down, then rebuild with several thin coats—not one heavy one.
- Splotchy look? Relax—use it for daily cooking, and the finish will even out in a few weeks.
Once this is in place, the rest of the routine falls into place naturally.
Your Cast Iron’s Best Years Ahead
If you take just one thing from this cast iron seasoning checklist, let it be: a little consistent care turns your skillet into the most non-stick, reliable pan you’ll ever own. Start with the right prep, build a solid seasoning, and touch it up over time—those simple habits keep rust and frustration far away.
Maybe cast iron used to feel stubborn or high-maintenance. Now you know the tricks for easy cleaning, deep seasoning, and handling every little hiccup. With these steps, your skillet becomes a joy to use for every meal—crispy potatoes, juicy steaks, and legendary cornbread are absolutely within reach. It’s not about perfection; it’s about confidence and progress.
What’s the biggest cast iron challenge you’ve fixed—or still want to tackle? Share your story or question in the comments. Let’s keep the (skillet) conversation going!

Blake Aaron Mercer is a cast iron cookware enthusiast and home cook dedicated to helping everyday people get the most out of their skillets, Dutch ovens, and griddles. With years of hands-on experience seasoning, restoring, and cooking with cast iron, Blake built Hnnew to be the honest, practical cast iron resource he always wished existed when he was starting out.