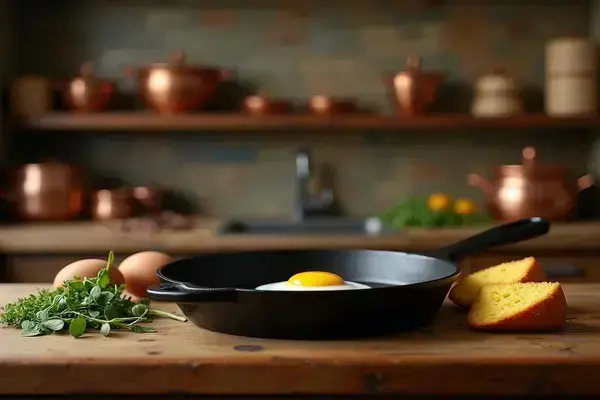
Ever tried to fry an egg and ended up scraping it off a scratched nonstick pan? Cast iron puts an end to that frustration—and honestly, the difference is night and day once you give it a chance.
There’s something timeless (and a little intimidating) about those heavy pans. Maybe you’ve let yours sit unused because you’re not sure where to start. But letting cast iron gather dust means missing out on foods that simply taste better—with less hassle than you think.
Here’s the thing: by the time you finish these 10 beginner-friendly dishes, you’ll have real confidence with your cast iron recipe starter guide. Get ready to unlock flavors you didn’t know you could create at home. The first recipe will surprise you.
Why Cast Iron Is the Perfect Choice for Beginners
Trying something new in the kitchen always comes with worry—what if the food sticks, burns, or never quite tastes like those mouthwatering social media photos? That’s where cast iron quietly steals the show. Unlike more expensive nonstick pans or delicate stainless steel, cast iron is forgiving, nearly indestructible, and only gets better with age.
What makes it stand out? It’s the iron itself. Cast iron absorbs and radiates heat evenly, which means pancakes brown beautifully and chicken never leaves raw, cold spots. You won’t find coatings that peel or warping handles; most brands give you a lifetime warranty for a reason.
💡 Pro Tip: Before your first use, preheat your cast iron for 5 minutes. This helps build a natural, nonstick layer and stops food from gluing itself to the pan. According to Lodge Cast Iron’s official care guidelines, ‘preheat first’ solves 90% of sticky food disasters.
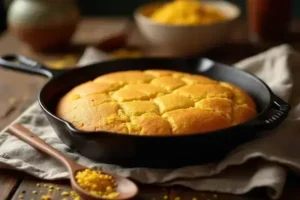
In practice: Imagine standing over your stove, ready for your very first skillet cornbread. You pour in the batter—the pan sizzles, and soon, the edges form a golden crust you can smell from across the kitchen. When it’s done, the bread lifts free, leaving no crumb behind. That confidence? Pure cast iron magic.
- Durability: A single skillet can last generations, withstanding drops and scrapes that would ruin other cookware.
- Versatility: Bake, fry, sear, roast—even go from stovetop to oven without missing a beat.
- Flavor Boost: With every use, seasoning (the slick layer of oil baked onto the pan) gets stronger and more nonstick.
- Value: High-quality options are affordable, and you can often rescue vintage pans at yard sales or secondhand shops.
| Material | Pros | Cons |
|---|---|---|
| Cast Iron (e.g. Lodge, Victoria) | Unmatched heat retention, nonstick with seasoning, lasts decades | Heavy, needs basic seasoning/care |
| Stainless Steel (e.g. All-Clad) | Lightweight, rust-resistant, dishwasher-safe | Uneven heat, food sticks without oil, pricier |
| Nonstick Aluminum (e.g. T-fal) | Easy to use and clean, lightweight | Coating wears off, can’t handle high heat |
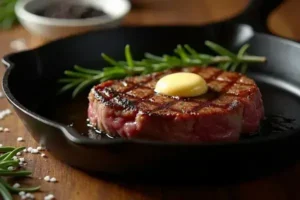
The American Culinary Federation notes that cast iron is recommended in professional kitchens specifically for searing and oven-baked dishes—so beginners gain instant chef cred with every meal.
But there’s one detail most owners completely overlook until it’s too late…
Must-Know Tips Before You Start Cooking
Wondering how to keep your cast iron truly nonstick? It’s not just about the pan—it’s how you prep, cook, and clean. The right foundation saves hours of scrubbing and piles of ruined eggs later on.
- Pre-season your skillet: Most cast iron pans come pre-seasoned, but giving it a quick rubdown with a thin coat of vegetable oil and a gentle bake at 375°F for an hour deepens the finish.
- Heat gradually: Cranking the burner up high from the start can warp and stress your skillet. Let it warm over medium for 5 minutes for even cooking and perfect searing.
- Use enough oil or fat: Even with a seasoned pan, a tablespoon of butter or high-smoke-point oil prevents sticking and helps build flavor.
- Mind acidic foods: Tomatoes and citrus can strip the seasoning on newer pans, so save the chili or lemon chicken until your skillet’s built up more protection.
- Never soak in soapy water: A splash of warm water and non-metal brush is all you need—detergents and long soaks break down your hard-earned seasoning.
⚠️ Important Warning: Never leave your cast iron to air dry. According to the Cast Iron Collectors Association, lingering moisture guarantees rust, even on brand-new pans. Dry thoroughly right on the still-warm stove, then wipe lightly with oil for a lasting finish.
Picture this scenario: You’ve just made perfect crispy roasted potatoes. You’re tempted to let the skillet “soak” while you eat. Instead, you rinse it quickly, dry it on the burner, and swipe a dot of oil inside. Next morning? It’s still slick and spotless—ready for pancakes or bacon, whatever you’re craving next.
| Tip | What it Prevents | When to Apply |
|---|---|---|
| Oil After Each Use | Rust, loss of nonstick surface | Every time you clean |
| Heat Slowly | Warps, uneven heating spots | Before adding food |
| Avoid Soap | Strips seasoning | During quick washes |
The National Sanitation Foundation states that mild cleaning—no harsh chemicals—prolongs both the safety and lifespan of seasoned cookware.
And this is exactly where most people make the most common mistake…
Essential Tools and Ingredients for Cast Iron Success
Ever start a new recipe and realize—mid-chop—you’re missing that one tool or a key ingredient? With cast iron, a short essentials list puts you way ahead. You don’t need a fancy kitchen arsenal. But what you do use makes a big difference in results, flavor, and ease of cleanup.
- Cast Iron Skillet or Dutch Oven: Seasoned from the factory or not, these are your versatile workhorses. Lodge and Victoria are great starter brands and widely available.
- Wooden or Silicone Spatula: Metal can scratch older seasoning. A wooden spatula or food-grade silicone keeps the pan’s slick surface intact.
- Lint-Free Towel or Paper Towels: A must for drying your pan to prevent rust. Cotton or bamboo cloths do the trick—quick and easy.
- High-Smoke Point Cooking Oil: Canola, grapeseed, or avocado oil are ideal. They won’t burn off as quickly and keep your seasoning strong. Butter is great for flavor but be sparing at first.
- Coarse Salt: For stubborn stuck bits, a sprinkle and a scrub with a damp towel can replace soap and protect your seasoning.
💡 Pro Tip: Skip synthetic sponges and always choose scrapers made from wood or hard plastic. The Cast Iron Collectors Association warns that steel wool or abrasive pads strip away layers of your hard-earned nonstick surface.
Picture this scenario: You’re making your first skillet pizza. The dough is ready, but it’s sticky. You dust the pan with a pinch of cornmeal (not flour) and use a silicone spatula to ease it out later. When it slides onto the plate perfectly crisp—but leaves the pan gleaming—you know you nailed the setup.
| Essential Tool/Ingredient | Why It Matters | Alternatives |
|---|---|---|
| Cast Iron Skillet | Main workhorse; high heat retention | Dutch oven for braises, griddle for flatbreads |
| Wooden Spatula | Keeps seasoning intact | Silicone spatula |
| Canola Oil | High smoke point for safe seasoning | Grapeseed or avocado oil |
| Coarse Salt | Gentle abrasive for cleaning | Baking soda in a pinch |
The Good Housekeeping Institute notes that using the right oil and gentle utensils are keys to making cast iron last for decades.
But there’s one detail most owners completely overlook until it’s too late…
Step-By-Step Recipes for Your First Week
Feeling intimidated by cast iron recipes? You’re not alone—a new skillet can be daunting at first. But here’s the thing: just one successful dish can flip that uncertainty to pure confidence. With a few simple steps (and ingredients you already have), you’ll be serving up golden-crisp edges and deep, savory flavors night after night.
- Cast Iron Skillet (10-12 inches, pre-seasoned)
- Neutral Oil (canola, avocado, or grapeseed)
- Eggs, chicken thighs, potatoes, cheese, flour, cornmeal, fresh veggies
- Wood/silicone spatula and oven mitt
- Classic Skillet Cornbread: Preheat oven to 425°F. Oil pan, pour in batter, bake 20 min. Cool slightly before slicing.
- Perfect Fried Eggs: Heat pan over medium. Add oil, crack in eggs, cover, cook 2-3 min for runny yolks—not more, or they’ll stick.
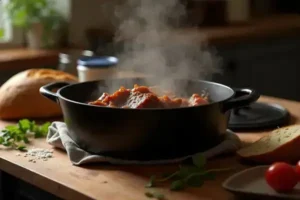
- One-Pan Chicken Thighs: Preheat skillet on medium-high. Season chicken, sear skin-side down for 6 min, flip, add veggies, bake at 400°F for 20 min.
- Crispy Breakfast Potatoes: Dice potatoes. Heat oil, add potatoes, stir occasionally until deep golden and crunchy. Season to taste.
- Sauteed Green Beans: Blanch beans first, then sauté quickly in hot skillet with a pat of butter (2 min). Salt and pepper to finish.
- Grilled Cheese Toasties: Butter bread, layer cheese, grill on medium, flip once for classic golden lines.
- Easy Pan Pizzas: Shape dough in oiled skillet, add sauce, cheese, toppings. Bake at 450°F until crust is crisp—about 14 min.
- Simple Skillet Frittata: Whisk eggs, add leftovers or cheese, cook gently, then finish under broiler for bubbly top.
- Brown Butter Apple Slices: Melt butter in pan, add apple slices and cinnamon, cook until soft and golden. Great with yogurt or ice cream.
- Quick Garlic Shrimp: Heat oil, toss cleaned shrimp, garlic, and chili flakes. Toss for 2–3 min until pink and curled.
💡 Pro Tip: Start new pans with higher-fat recipes (like cornbread or bacon) to reinforce seasoning fast. The Cookware Manufacturers Association highlights these dishes for helping pans become nearly nonstick within the first week.
In practice: Say you’re on day three—you tried eggs, they stuck a bit, but then on night five your first pan pizza slides out in one glorious, golden crust. That’s not luck; it’s the skillet’s seasoning building with every meal.
What actually works might surprise you…
How to Clean and Care for Your Cast Iron After Cooking
What’s the real secret to cast iron that looks and performs like new, meal after meal? It’s not magic — it’s all in the aftercare. Proper cleaning keeps your pan nonstick and rust-free for generations to come.
- Let It Cool, but Not Too Much: Wait a few minutes after cooking, but don’t let the pan get stone-cold. Residual heat helps loosen stuck-on bits and speeds up cleaning.
- Hand Wash Only: Use hot water and a non-metal brush or sponge. Skip the soap most of the time; it strips away your hard-earned seasoning. If you must use soap, only use a drop and rinse quickly.
- Banish Stuck-On Food: For really stubborn messes, pour in coarse salt and scrub gently. This keeps the nonstick barrier strong while removing food debris.
- Dry Immediately and Thoroughly: Water is cast iron’s enemy. Dry your pan over low heat on the stove. Never leave it to air dry, or you risk instant rust—even overnight.
- Oil Lightly After Cleaning: When the pan’s dry and still a bit warm, add a few drops of neutral oil. Wipe it in with a paper towel or lint-free cloth until there’s only a thin, invisible layer left.
💡 Pro Tip: If you spot a little rust, don’t panic—it’s fixable. Gently scrub the spot with a bit of oil and coarse salt, rinse, dry, and reseason by baking with oil in a 375°F oven for an hour. The Culinary Institute of America recommends this quick rescue to extend your pan’s life and performance.
In practice: Imagine you made apple cobbler. You serve dessert, eat, then rinse your warm pan with water, dry it on the burner, and swipe a film of oil inside. Next morning, it gleams—no sticky residue, no rusty surprises.
| Step | Why It Matters | What to Avoid |
|---|---|---|
| Hand wash with hot water | Keeps seasoning strong | Dishwasher, soaking, harsh detergents |
| Dry immediately | Prevents rust formation | Air drying, stacking damp |
| Apply oil while warm | Preserves nonstick surface | Letting pan cool before oiling |
Food safety authorities, such as the USDA, agree: diligent, gentle cleaning makes cast iron cookware both safe and reliable for years. The right habits in place now make everything easier from here.
Your First Cast Iron Wins
If you take just one thing from this cast iron recipe starter guide, let it be: confidence comes from starting simple and caring for your pan the right way. With even heat, basic seasoning, and a few honest meals (wins or fails!), you’ll unlock a world of flavor and ease.
Maybe cooking with cast iron used to feel mysterious or high-maintenance. Now? You’ve got practical steps, saving you frustration and guesswork. Every meal you try, you’re building real skills and a slick, nonstick pan that only gets better. You’re already ahead.
Which one of these easy dishes will you make first — the skillet pizza, crispy potatoes, or maybe your own pan-fried eggs? Tell us in the comments and share your kitchen wins!

Blake Aaron Mercer is a cast iron cookware enthusiast and home cook dedicated to helping everyday people get the most out of their skillets, Dutch ovens, and griddles. With years of hands-on experience seasoning, restoring, and cooking with cast iron, Blake built Hnnew to be the honest, practical cast iron resource he always wished existed when he was starting out.